
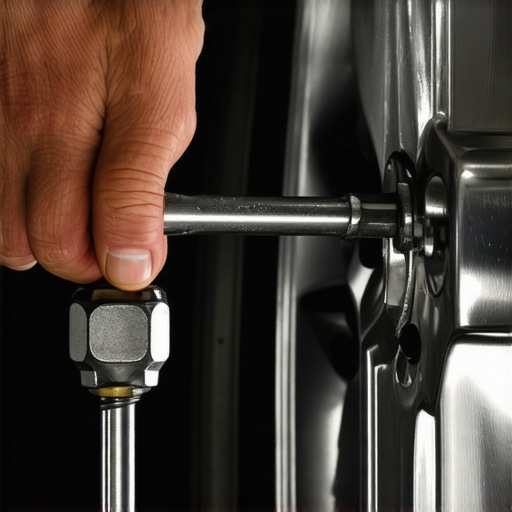
I was so proud of myself after finishing my first full brake swap. The parts were shiny, the pads were thick, and I’d saved a few hundred bucks doing it in my driveway. But two months later, every time I tapped the pedal, the steering wheel felt like it wanted to jump out of my hands. I’d fallen victim to that annoying pulse that makes every stoplight a chore. I blamed the parts. I blamed the manufacturer. But eventually, I had to look in the mirror and blame my own ‘close enough’ attitude with a lug wrench. Today, I’m going to show you how to avoid my expensive mistake by mastering the specific science of clamping force. We are going to stop why your brake rotors keep warping every few months and get your car back to a smooth, factory feel. Have you ever felt that annoying shimmy right after a tire rotation? It’s more common than you think.
The Day I Finally Realized Tightness Isnt the Only Goal
When I first started wrenching, I thought ‘tight’ was ‘tight.’ I’d lean on that tire iron until my face turned red, or worse, I’d use an impact gun to rattle those nuts home in seconds. What I didn’t realize is that brake rotors are sensitive. They are thin discs of iron that need to sit perfectly flat against the hub. When you tighten one lug nut to 120 ft-lbs and the one next to it to 80 ft-lbs, you aren’t just holding the wheel on—you are literally pulling the rotor out of shape. It’s a classic case of troubleshooting common auto repair issues before visiting the shop only to find out you caused the issue yourself. It’s a bitter pill to swallow. I learned the hard way that ‘Ugga-Dugga’ is not a unit of measurement. According to the technical specialists at Brembo, uneven torque is the leading cause of lateral runout, which eventually leads to uneven pad wear and warped rotors. If the pressure isn’t perfectly uniform, the heat generated during braking won’t dissipate evenly. This creates ‘hot spots’ that permanently change the metal’s structure. You aren’t just bending the rotor; you’re killing it.
Is a fancy torque wrench actually worth the money?
You might be thinking that your grandfather never used a torque wrench and his trucks ran for thirty years. I get it. I used to be a skeptic too. But modern rotors are lighter and more heat-sensitive than the heavy iron slabs of the 1970s. If you want to debunk some brake service myths, start by understanding that precision actually saves you money. This isn’t just about being a perfectionist; understanding brake system repairs means respecting the tolerances that engineers spent thousands of hours perfecting. A $50 tool is a lot cheaper than buying new rotors every summer. Believe me, your car—and your wallet—will thank you for the extra five minutes of effort.
Scrub the Metal Until It Shines
Before that new rotor even touches your car, you have to treat the hub surface like a surgeon treats an operating table. I remember a rainy Tuesday when I was rushing a wheel swap; I was cold and just wanted to be done. I slapped the rotors on over a crusty hub and zipped the nuts tight with an impact. Two weeks later, the pulse was back. When I finally took it apart, I found a single flake of rust trapped between the hub and the rotor. That tiny speck, no thicker than a fingernail, was enough to throw the entire disc out of alignment. If you don’t use a wire brush to get that surface perfectly smooth, you’re basically building a house on a pile of gravel. This is a vital part of any car service checklist that most DIYers skip because it’s tedious.
Why Surface Prep Prevents Premature Failure
Think of the rotor-to-hub connection as a marriage; if there is even a little bit of ‘baggage’ (rust or grit) in between them, the relationship is going to be rocky. Any unevenness here creates lateral runout. As the rotor spins, it wobbles ever so slightly, hitting the brake pads even when you aren’t touching the pedal. This creates friction, which creates heat, which eventually leads to why your brake rotors keep warping every few months. You aren’t just looking for ‘clean’; you are looking for bare, shiny metal. If you see pits or scales, keep scrubbing until the face is uniform.
The Secret Rhythm of the Star Pattern
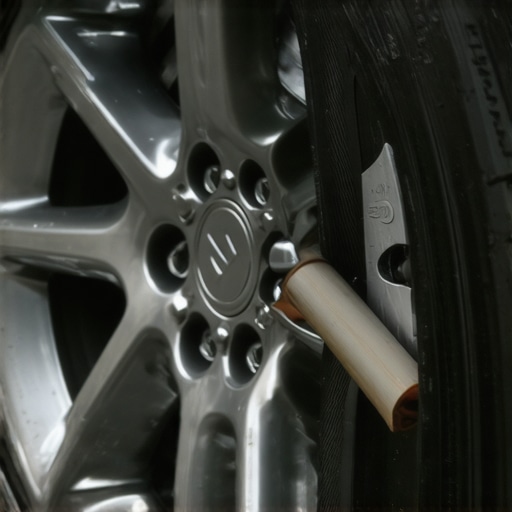
Once the surfaces are mated, the way you tighten the lug nuts determines the life of the rotor. Imagine you are stretching a new skin over a snare drum. If you tighten one side all the way down first, the skin will pull unevenly and sound terrible. Your brake rotor is the same. If you crank down the top nut first, you tilt the rotor. Even if you tighten the others later, that initial ‘crush’ can permanently set a micro-bend into the metal. This is one of those expert tune-up strategies that separates a professional job from an amateur mistake.
Why You Must Tighten in Three Waves
Never go to full torque in one shot. I follow a three-stage rule: ‘Snug,’ ‘Firm,’ and ‘Final.’ In the first pass, I use a hand wrench just to get the nuts seated. In the second pass, I go to about 50% of the manufacturer’s spec—usually around 40-50 ft-lbs. Only on the third pass do I click the torque wrench to the final setting. This incremental pressure allows the rotor to seat itself naturally against the hub without binding. If you’ve ever felt a spongy brake pedal or a weird vibration, it might not be air in the lines; it might be a rotor that was forced into a bind by uneven tightening. By spreading the load gradually, you ensure the clamping force is a perfect circle, not a jagged star. This meticulous approach is how you ensure every understanding brake system repairs session results in a car that stops as smooth as silk.
People always tell you that you ‘warped’ your rotors because you got them too hot or drove through a puddle. In my years under the hood, I’ve found that true warping—where the metal actually bends—is incredibly rare in modern street cars. Most of the time, that vibration is actually Disc Thickness Variation (DTV). When you finish a spirited drive and come to a dead stop, holding your foot firmly on the pedal, you’re essentially ‘printing’ brake pad material onto the hot rotor face. This creates an uneven layer of friction material that mimics the feel of a warped disc. This is a classic example of brake service myths that lead people to waste money on new parts when a proper bedding procedure could have saved them.
The Cementite Trap Most DIYers Ignore
There is a chemical change that happens when cast iron gets too hot in one specific spot. According to a technical study by the Society of Automotive Engineers (SAE), if the rotor temperature exceeds certain limits while stationary, it can lead to the formation of ‘cementite’—an incredibly hard, brittle iron carbide. Once these hard spots form, no amount of ‘turning’ the rotors on a lathe will fix it because the lathe bit will just hop over the harder patches. This is often why your brake rotors keep warping every few months even after you’ve had them machined. If you’ve ever felt the real reason your car pulls under heavy braking is inconsistent friction, you’re likely dealing with this molecular nightmare. 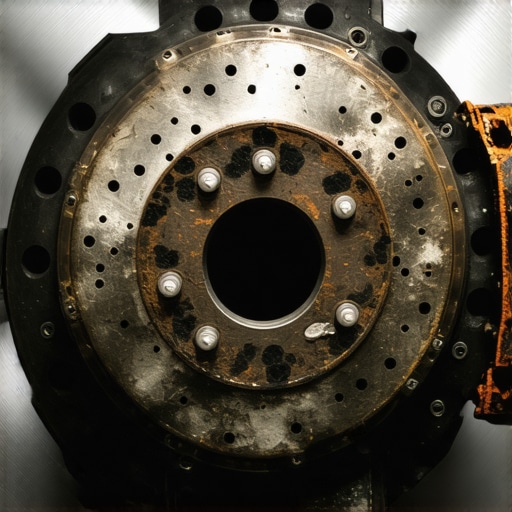
Does the choice of brake lubricant actually prevent mechanical failure?
Many beginners think any grease will do, but using a petroleum-based lubricant on rubber caliper boots is a recipe for disaster. Petroleum causes rubber to swell and seize, which is a common ‘oops’ factor that leads to uneven wear. You must use a high-temp silicone or synthetic lubricant specifically designed for brake systems. Failure to do this is a major reason for how to spot a leaking brake caliper before it fails, as the boots eventually tear and let in moisture. If you are already performing a tune-up for peak performance, don’t undercut your hard work with the wrong grease.
Why Your Rear Brakes Might Be Outpacing the Fronts
There is a common belief that front brakes do all the work, but modern Electronic Brake-force Distribution (EBD) systems have changed the game. These systems often bias the rear brakes during light stops to prevent ‘nose dive’ and improve passenger comfort. This is the real reason your rear brakes wear faster than fronts on many newer SUVs and sedans. If you notice your rear pads are gone at 30,000 miles while the fronts look new, don’t assume something is broken. However, always include a quick check of the slide pins in your car service checklist to ensure they aren’t sticking. Mastering these nuances is how you maximize your car’s lifespan with expert tune-up strategies. Have you ever fallen into this trap of ‘printing’ your pads onto your rotors after a hard stop? Let me know in the comments.It took me years to realize that my hands aren’t calibrated instruments. I used to think I could feel when a bolt was tight enough, but after I snapped a caliper slide pin on a Sunday afternoon with every parts store closed, I finally humbled myself. If you want to stop the cycle of vibration and noise, you need to invest in a quality digital torque wrench and, more importantly, a dial indicator. A dial indicator allows you to measure lateral runout—that tiny wobble I mentioned earlier—down to the thousandth of an inch. If you measure more than .002 inches of runout, you are going to feel it in the pedal eventually. Using professional diagnostics equipment isn’t just for the pros; it is how you ensure your driveway repairs actually last. One specific expert source, the technical training manuals from Akebono Brake Corporation, emphasizes that cleanliness and lubrication of the bracket’s abutment clips are just as critical as the pads themselves. It is not just about the metal parts. Your brake fluid is hygroscopic, meaning it literally sucks moisture out of the air. Over time, this water lowers the boiling point of the fluid and corrodes your calipers from the inside out. This is a massive factor in the hidden culprit behind a spongy brake pedal that most people ignore until they are panicking at a red light. Every time you perform a car service checklist, you should be testing that fluid with a copper-strip kit or an electronic tester. 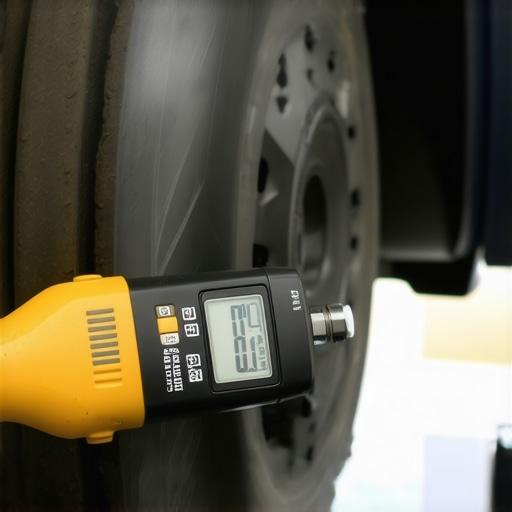
How do I keep my brakes feeling new for 100,000 miles?
Consistency is your only real defense. You cannot just fix things when they break and expect a smooth ride. I have started a habit of ‘mid-life’ brake services. At 25,000 miles, even if the pads look fine, I pull the wheels, clean the dust out, and re-grease the slide pins with high-quality silicone lube. This prevents the pins from seizing and ensures the pads wear perfectly flat. This level of expert tune-up strategies pays off because it prevents the ‘cascade failure’ where one stuck pin ruins a rotor, which then ruins a hub bearing. Looking ahead, I see auto repair trends to watch in 2025 shifting heavily toward ‘brake-by-wire’ systems. As we move closer to full electrification, our traditional mechanical connection to the brakes is disappearing. We will rely more on sensors and software to tell us when a pad is thin or a rotor is overheating. While this sounds high-tech, the basic physics of clamping force won’t change. You still need a flat surface and even pressure. If you want a car that performs perfectly, stop treating understanding brake system repairs as an occasional chore and start seeing it as a precision craft. Grab a dial indicator before your next job—it is the only way to know for sure that your rotors are true.
The Hardest Lesson My Driveway Ever Taught Me
Looking back at my early years of DIY maintenance, I realize I spent more time fixing my own mistakes than actually improving the car. The most humbling moment came when I realized that a $20 wire brush was the only thing standing between a perfect stop and a vibrating steering wheel. I used to think car service was just about the big parts, but it is really about the microscopic details. If I could go back, I would tell myself that cleanliness isn’t just for looks; it is a mechanical necessity. Most of the rotors I threw in the trash weren’t actually defective; they were just victims of my own impatience. I’ve learned that taking ten extra minutes to prep a surface is the difference between a job that lasts six months and one that lasts six years. This realization is exactly the truth about why my car finally hit 200000 miles without a major brake failure.
- Precision over power: Your muscles are not a torque wrench. Even pressure is more important than absolute tightness.
- Rust is the enemy: Any debris between the hub and rotor will eventually feel like a warped disc.
- Bedding is mandatory: Never skip the break-in procedure, or you will end up with uneven pad deposits.
Gear That Keeps My Garage Running Smoothly
If you are serious about moving beyond basic part-swapping, you need a few specific items that the local shop guys keep in their private toolboxes. I personally swear by the Tekton 1/2-Inch Drive Click Torque Wrench; it is affordable, accurate, and feels solid in the hand. For surface prep, skip the cheap sandpaper and get a 3M Hub Cleaning Kit. It attaches to your drill and clears away years of corrosion in seconds, ensuring your rotor sits dead-flush. I also highly recommend keeping a copy of your vehicle’s factory service manual—not a generic one, but the specific guide for your VIN. These tools are the backbone of any ultimate car service guide when and why to schedule maintenance. Finally, always have a bottle of high-temp silicone ceramic brake lubricant on hand to keep those pins moving freely.
Take the Reins on Your Next Maintenance Day
It is easy to feel intimidated by the math and the precision required for a perfect brake service, but don’t let the fear of a little wobble keep you from doing it yourself. There is a deep sense of satisfaction in coming to a perfectly smooth stop, knowing that you did the work correctly and safely. When you take the time to understand the ‘why’ behind the torque and the ‘how’ behind the hub cleaning, you are doing more than just saving money—you are becoming a better steward of your machine. It is these small wins that show how regular tune-ups improve fuel efficiency and safety across the board. So, the next time you feel that pulse in the pedal, don’t just order parts. Order the right tools, clear your afternoon, and do it right. Have you ever struggled with getting your lug nuts perfectly even or finding that hidden shimmy? Let me know below.