
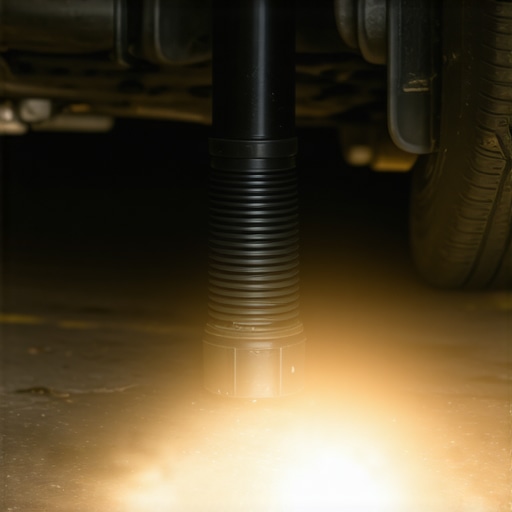
I’ll never forget the sound of my first major mechanical failure. It wasn’t a bang or a crash; it was a rhythmic click-click-click every time I turned the steering wheel into my driveway. I figured it was just the car getting older, maybe a loose piece of plastic. I was wrong. By the time I finally crawled under there, the passenger-side wheel well looked like a grease bomb had gone off. My CV boot—that simple, accordion-like rubber sleeve—had split wide open, letting all the vital lubrication fly out and inviting road grit in to chew up the joint. I ended up spending my entire weekend and several hundred dollars on a replacement that could have been avoided with a five-minute visual check during a routine car service. Today, I want to help you avoid that greasy, expensive mess by showing you exactly how to spot those sneaky small cracks before they leave you stranded.
Don’t Let a Cheap Rubber Part Total Your Axle
It’s easy to focus on big things like brake system repairs or engine health, but these tiny rubber boots are the unsung heroes of your drivetrain. Their only job is to keep grease in and dirt out. Once a crack forms, it is a ticking clock. If you’ve noticed why your car grinds only when you turn the wheel, you might already be in trouble, but catching it at the “small crack” stage is the ultimate win for your wallet. According to the automotive experts at AAA, neglect of minor maintenance items like cracked boots is a leading cause of preventable roadside breakdowns. I’ve learned the hard way that troubleshooting common auto repair issues early is the only way to stay ahead of the curve.
Is crawling under the car really worth the effort?
I get it—you’re busy, and the idea of getting your hands dirty just to look at a piece of rubber seems overkill. But think about it this way: would you rather spend ten minutes with a flashlight now, or six hours in a waiting room later? When I first started working on my own vehicles, I thought a tune up was just about spark plugs and air filters. I completely ignored the undercarriage. That mistake cost me an entire CV axle and a very frustrated afternoon. Have you ever heard a weird noise and just turned up the radio hoping it would go away? Trust me, we’ve all been there, but your CV joints won’t heal themselves. If you want to keep your vehicle in top shape, you have to look where the sun doesn’t shine.
We are going to walk through the process of a DIY inspection that requires almost zero tools. By the end of this, you’ll know exactly how to manipulate the rubber to reveal the hidden “dry rot” that most people miss. We aren’t just looking for holes; we’re looking for the intent to fail. So, grab a rag and a bright light, because we’re about to save your axle from an early grave.
Step-by-Step Guide to the DIY Boot Inspection
To get started, you don’t even need a jack, though it helps. Start by cranking your steering wheel all the way to the left or right lock. This stretches the rubber out like an accordion, pulling the deep folds apart where the most dangerous cracks like to hide. Think of your CV boot like a bendy straw—when it is compressed, the plastic looks solid, but as soon as you bend it, the stress points reveal themselves. I remember doing this on my sister’s old hatchback; from a distance, the axles looked pristine, but once I turned the wheel, a half-inch split appeared that was already weeping grease. Catching it then meant a simple boot swap instead of a full car service involving an entirely new drivetrain assembly.
Clean the Rubber Before You Judge
Road grime is a master of disguise. It covers up dry rot and small nicks with a layer of grey dust. Take a damp rag and wipe down the entire length of the boot. You are looking for ‘alligatoring’—that pattern of fine, surface-level cracks that indicate the rubber is losing its elasticity. If the rubber feels brittle or stiff rather than pliable, it is already on its way out. This is essentially the 5-minute check to prevent transmission failure for your front-end components. While you are down there, it is also a good time to look at other nearby rubber components to see if they share the same wear patterns, much like you would during brake system repairs.
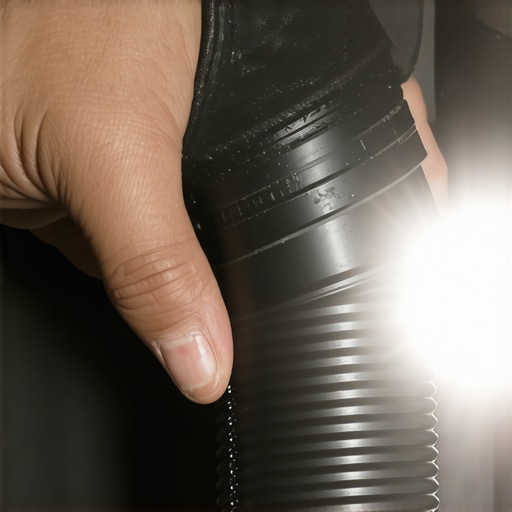
Squeeze the Folds to Find Dry Rot
Looking isn’t always enough; you have to get your hands dirty. Reach in and gently squeeze the ribs of the boot. You want to see if any of those tiny surface cracks open up into deep canyons. If you see silver metal or dark grease peeking through when you flex the rubber, the seal is broken. I once ignored a ‘tiny’ crack on my own truck, thinking I had months left. Three weeks later, after a particularly rainy commute, the grease had emulsified with road water and turned into a useless slurry. By the time I noticed the vibration, I was already researching how to tell if your wheel alignment is actually off, only to find the culprit was a shredded joint. Trust the squeeze test—it never lies.
Search for the Tell-Tale Grease Spray
If you can’t see the crack, look for its signature. When a boot rips while you’re driving, the centrifugal force of the spinning axle flings grease everywhere. Look at the inside of your wheel rim, the brake caliper, and the lower control arm. If you see thick, dark spatters that look like someone set off a small grease bomb, your boot is gone. This mess is often mistaken for a leak in the steering system, so knowing how to tell if your rack and pinion is leaking fluid is key to a correct diagnosis. CV grease is significantly thicker and more stubborn to clean than power steering fluid. Keeping these areas clean is a vital part of any car service checklist to ensure you aren’t masking a developing disaster.
Stop Trusting the Click as Your First Warning Sign
Most backyard mechanics will tell you that as long as your car isn’t making that signature rhythmic clicking sound, your CV joints are perfectly fine. I’m here to tell you that waiting for the noise is the most expensive mistake you can make. By the time you hear a click, the damage is already structural. I’ve seen enthusiasts spend hours on expert tune-up strategies only to ignore a weeping boot because it wasn’t ‘noisy yet.’ If road grit has entered that boot for even forty-eight hours, it acts like a grinding paste. The National Institute for Automotive Service Excellence (ASE) emphasizes that microscopic scoring on the race and cage of the joint begins almost immediately upon contamination. You might seal it back up with a new boot, but the internal ‘cancer’ of metal-on-metal friction has already started. This is one of those brake service myths and mechanical misconceptions that ends up costing you a full axle replacement later.
The Fool’s Gold of Universal Split Boots
If you search for a quick fix, you’ll find ‘split boots’ that claim you can install them without removing the axle. Here is the ‘oops’ factor: these are almost always a waste of money. The adhesive or tiny bolts used to join the seam rarely hold up to the centrifugal force of a spinning axle. I tried one on an old project car years ago, and it lasted exactly three days before flinging grease all over my rotors. When troubleshooting common auto repair issues before visiting the shop, don’t look for the easiest exit. A proper repair requires pulling the axle, cleaning the joint thoroughly, and using a high-quality, seamless rubber boot. Using a split boot is like trying to fix a leak with duct tape while the water is still running—it’s a temporary band-aid that often masks a total failure.
#IMAGE_PLACE_HOLDER_C#
Why does my axle vibration feel like a bad alignment?
This is where the real nuance comes in. I’ve had readers ask why their car shakes at highway speeds even after they’ve had their tires balanced. It is easy to assume you need to know how to tell if your wheel alignment is actually off, but a failing CV joint—specifically the inner tripod joint—causes a very specific side-to-side shudder during acceleration. Unlike alignment, which usually pulls or vibrates constantly, a CV-related vibration often disappears the moment you take your foot off the gas. This subtle distinction is the difference between a $100 alignment check and a necessary drivetrain repair. This is essentially the 5-minute check to prevent transmission failure or secondary damage to your differential seals. Have you ever fallen into this trap of misdiagnosing a vibration? Let me know in the comments. We need to look past the symptoms and understand the mechanics of the ‘oscillation’ to truly save the vehicle from the scrap heap.
I didn’t truly appreciate the value of proper lighting until I spent an hour squinting under my old sedan, only to miss a massive split because of a dying flashlight. Now, I swear by a rechargeable magnetic LED wand. It sticks to the subframe and floods the area with 500 lumens, turning a dark cave into a surgical suite. When you are troubleshooting common auto repair issues before visiting the shop, you need to see exactly where the grease ends and the rubber begins. I also keep a set of long-reach dental picks. They are perfect for gently lifting the folds of the boot without puncturing the rubber, allowing you to see if the valley of the accordion is dry-rotting. Using the right gear is part of how you maximize your car’s lifespan with expert tune-up strategies. 
How do I maintain my drivetrain health over time?
Consistency is your best friend. Every time you have the car up for brake system repairs, take those extra sixty seconds to inspect the axles. According to technical documentation from the Car Care Council, regular inspections can catch up to 80% of major failures before they occur. It isn’t just about looking; it is about keeping a record. I use a simple logbook to track when I last cleaned the undercarriage, which helps me stay on top of my car service checklist. If you live in an area where they salt the roads, a pressurized undercarriage wash is non-negotiable. Salt is a catalyst for dry rot, and it will eat through your rubber components faster than you can say ‘axle click.’
The Future of Your Axles in the Electric Era
Looking forward, the shift toward electric vehicles is making this even more critical. While EVs have fewer moving engine parts, their high instantaneous torque puts significantly more stress on CV joints and boots than traditional internal combustion engines ever did. Staying updated on auto repair trends to watch in 2025 means realizing that your drivetrain needs even more love as horsepower numbers climb. We are seeing a trend toward high-performance thermoplastic boots that offer better heat resistance, but the inspection principles remain the same. Don’t let new technology make you lazy about the basics of a car service. I challenge you to grab a bright light this weekend and perform the ‘squeeze test’ I described earlier. Catching one tiny crack today will literally save you hundreds of dollars and a whole lot of frustration tomorrow.
Hard Truths From a Decade Under the Hood
After years of grease under my fingernails, I’ve realized that the most expensive car repairs almost always start as five-dollar problems. One thing I’ve learned is that heat is the silent killer; if you live in a desert climate or sit in stop-and-go traffic, your rubber boots will dry out twice as fast as the manual suggests. Another hard-earned lesson: never trust a “passing” state inspection as a guarantee of your drivetrain health. Many inspectors only look for catastrophic tears, missing the subtle dry rot we discussed. I also found that why your transmission shudders on the highway is often actually an inner CV joint issue that started with a tiny, ignored crack. Finally, remember that cleaning is part of the repair; road salt left in those rubber folds acts like sandpaper, so mastering the best way to remove road salt from your undercarriage is non-negotiable for longevity.
The Small Kit That Saves Big Money
You don’t need a professional shop to be a proactive owner. My personal toolkit for these checks includes a high-output rechargeable LED wand—because if you can’t see the cracks, you can’t fix them. I also rely on heavy-duty nitrile gloves (at least 6-mil thickness) because CV grease is notoriously difficult to wash off. For those who want to go deeper, I highly recommend keeping a set of plastic non-marring pry tools; they allow you to safely spread the boot folds without any risk of puncturing the rubber. Combining these tools with a solid maximize your car’s lifespan with expert tune-up strategies mindset will keep you out of the repair shop and on the road. I also suggest learning how to check your tie-rod ends with minimal tools while you’re already under there with your light.
Take Control of Your Car’s Lifespan Today
Getting to know the underside of your vehicle is about more than just saving money—it’s about the peace of mind that comes from knowing your car is truly safe. By performing the 5-minute check to prevent transmission failure and drivetrain collapse, you’re becoming an advocate for your own vehicle’s health. Don’t be intimidated by the mechanical complexity; start with the rubber boots and work your way up. Your car—and your bank account—will thank you for the extra attention. Have you ever discovered a hidden mechanical issue just by poking around with a flashlight? Let me know in the comments below!