
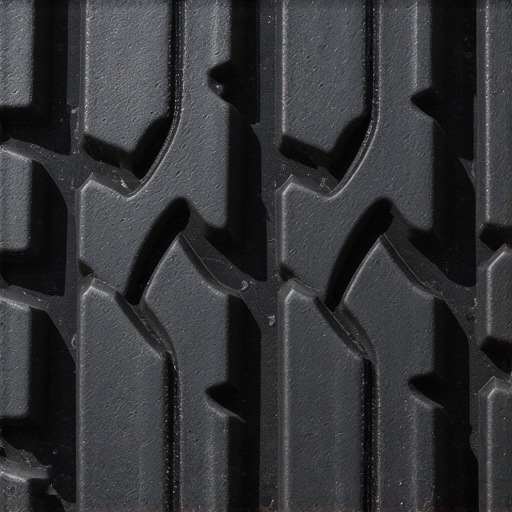
I was cruising down the highway last summer, enjoying what I thought was a smooth ride, when a rhythmic thump-thump-thump started echoing through the cabin. At first, I just cranked up the radio. Problem solved, right? Wrong. Within a week, my steering wheel felt like it was possessed by a caffeinated squirrel every time I hit a bridge expansion joint. I initially assumed I just needed a quick tune up for peak performance or perhaps a wheel balance. But when I finally knelt down in my driveway and really looked at my front tires, the truth was staring me in the face. The tread wasn’t just worn; it was ‘cupped’—full of weird, scooped-out dips that looked like a miniature mountain range. That was my expensive wake-up call that my shocks were completely shot. Today, I’m going to help you avoid that same $800 mistake by showing you exactly how to diagnose your suspension just by reading your rubber.
The Day My Tires Started Looking Like Scalloped Potatoes
I’ll be honest: early on, I made the classic rookie mistake of thinking that as long as my car wasn’t leaking oily fluid onto the driveway, my shocks were fine. I even went as far as checking if my wheel alignment was off because the car was darting around. I spent good money on an alignment I didn’t need, ignoring the fact that troubleshooting common auto repair issues usually starts with the most visible evidence. When your shocks or struts fail, they stop keeping the tire firmly pressed against the road. Instead, the tire bounces like a basketball, and every time it hits the pavement, a little chunk of rubber gets scrubbed away. This creates cupping or scalloping. If you see these uneven patches, your shocks are no longer doing their job of dampening that spring energy. It’s not just an annoyance; it’s a massive safety risk. In fact, according to the Safety Assessment Federation, even a single worn shock absorber can increase your braking distance by up to 11% at highway speeds—that’s often the difference between a close call and a fender bender. Have you ever noticed your car feeling a bit too ‘bouncy’ lately, or have you seen strange patterns on your tread?
Is a DIY tire inspection actually enough to trust my safety?
You might be skeptical that looking at some rubber is a substitute for a shop’s diagnostic rack. While a professional car service is always a good idea for a final confirmation, your tires are the most honest witnesses you have. They don’t lie about how they’ve been hitting the road. By catching these signs early, you can get more life out of your current tires and avoid the signs your struts are finally bottoming out and causing permanent damage to your chassis. Let’s dive into the specific visual cues you need to look for before you head to the mechanic.My neighbor Dave recently swore his car needed a full brake service because of a rhythmic vibration. He was convinced the rotors were warped. I walked over, knelt by his rear wheel, and ran my palm across the tread. It felt like a serrated knife. I told him to cancel the brake appointment; his shocks were so dead they were letting the tires jump like a pogo stick. To avoid Dave’s confusion, you need a systematic way to look at your rubber before you blame the brakes or the alignment.
Start with the Tactile Palm Sweep
Most tire wear is felt before it is seen. Think of your tire tread as a topographic map. When you run your hand clockwise and then counter-clockwise around the circumference, the surface should feel relatively uniform. If the tread blocks feel sharp in one direction but smooth in the other, you’ve got ‘feathering,’ which usually points to alignment issues. But if you feel distinct ‘dips’ or scooped-out craters, you are feeling cupping. This is the hallmark of a suspension system that has lost its ability to control the wheel’s vertical movement. It’s a great addition to your car service checklist to perform this sweep every time you wash your car. 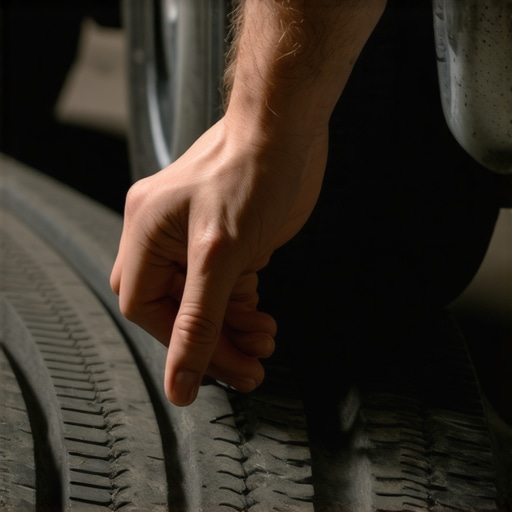
The Flashlight Angle for Hidden Valley Detection
Sometimes your eyes can’t catch the subtle depth changes in black rubber. This is where a high-lumen flashlight becomes your best friend. Wait until the sun goes down or pull into a dark garage. Lay the flashlight flat against the ground, shining the beam across the face of the tire tread. The low-angle light creates long shadows in any cupped areas. If your tire looks like the surface of the moon, your shocks are no longer keeping the tire pinned to the asphalt. This simple visual trick is much faster than learning how to spot a leaking shock without using a lift, though you should eventually check for oily residue on the shock body itself to confirm the failure.
Why the Bounce Test Still Matters
Once the tires show you the evidence, you need to verify the hardware. The ‘Bounce Test’ is a classic for a reason—it works. Walk to the corner of the car where you suspect the issue is. Use your body weight to push down hard on the fender or bumper, then let go. A healthy suspension will rebound once and settle immediately. If the car continues to oscillate or ‘jiggle’ more than twice, the internal valving of your strut is shot. This lack of control doesn’t just eat tires; it can lead to a spongy brake pedal feeling because the car’s weight is shifting too much during deceleration. This is why troubleshooting common auto repair issues early matters. If the bounce test fails, it’s time to maximize your cars lifespan with expert tune up strategies by replacing those dampers before the vibration rattles your tie rod ends into early retirement.Most people assume that if the car pulls to one side, it is a simple alignment issue. I have seen folks spend hundreds on multiple alignments, only to find the car still drifts. In my experience, a ‘tired’ strut that has lost its internal gas pressure can cause a ride-height variance that mimics a bad alignment. If you only fix the angle without addressing the support, you are just putting a band-aid on a broken bone. This is why understanding brake system repairs and suspension geometry is vital; they are two sides of the same coin.
Stop Blaming Your Alignment for Every Shake
Common wisdom says a vibrating steering wheel equals a wheel balance issue. While that is often true, I have found that many ‘mystery vibrations’ are actually caused by internal tire delamination or ‘ghost’ cupping that has not yet become visible. If you have been how regular tune-ups improve fuel efficiency and safety, do not forget that your suspension is the foundation of that efficiency. A car that bounces even slightly is wasting energy and scrubbing speed.
The Expensive Mistake of Replacing Just One Side
Here is the ‘oops’ factor that kills many DIY budgets: replacing only the leaking shock. I know, money is tight, and it is tempting to only swap the broken part. But shocks and struts are like shoes—you never replace just the left one. A new shock on the right side paired with a 50,000-mile-old shock on the left creates an imbalance in damping rates. This can lead to dangerous handling during emergency maneuvers and is often the real reason your car pulls under heavy braking. According to the Monroe Intelligent Suspension researchers, even a slightly worn shock can degrade the performance of your ABS, as the system struggles to modulate pressure on a wheel that is constantly hopping. 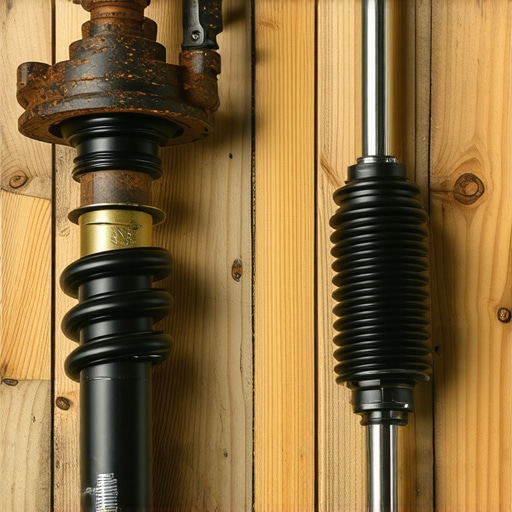
Why Does the Vibration Persist After a Professional Balance?
If you have balanced the tires and the shake is still there, you might be dealing with ‘run-out’ in the hub or a CV axle that is slightly out of true. Another nuance: sometimes why your brake rotors keep warping every few months is not about the rotors at all, but about worn suspension bushings allowing too much movement, which leads to uneven heat buildup. As we look at auto repair trends to watch in 2025, we are seeing more integrated sensors that will tell you exactly when a damper is failing, but for now, your hands and eyes are still the best tools you own. Have you ever fallen into the trap of replacing parts one by one instead of in pairs? Let me know in the comments.
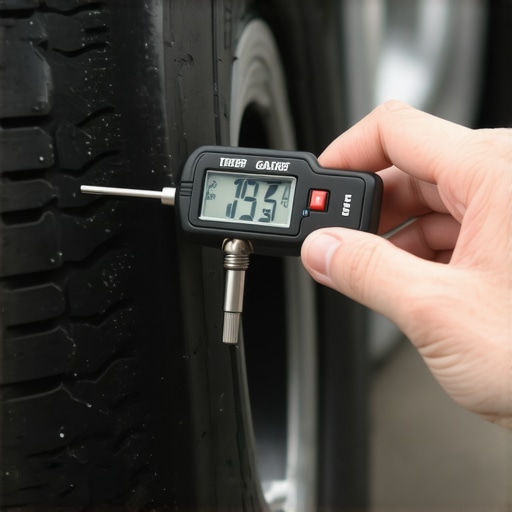
To keep my ride from turning back into a bouncy castle, I stopped relying on my ‘gut feeling’ and started investing in a few specific tools that every driveway mechanic should own. Precision is the enemy of expensive repairs. For instance, I used to eyeball my tread, but now I use a high-accuracy digital tread depth gauge. This $15 tool allows me to see uneven wear patterns weeks before they are visible to the naked eye, helping me realize the hidden benefit of rotating tires every 5000 miles isn’t just a suggestion—it is a tire-saving law. If I see 0.5mm more wear on the inside edge, I know my camber is slightly off, or my struts are beginning to fatigue under load.
The Cheap Digital Gauge That Stops the Guesswork
I personally use a gauge that reads in increments of 0.01mm. Why? Because early detection of cupping or feathering lets me swap components before the vibration ruins the wheel bearings. It is much easier to the best way to store your tires over the summer if you actually have some rubber left on them to store! According to Bilstein’s internal technical bulletins, a standard shock absorber can cycle up to 2,800 times per mile on a typical road. That is a massive amount of internal friction and heat, which is why a ‘visual check’ is often the bare minimum. You need to be looking for those tiny variations in tread depth that signal the hardware is tired.
Why I Never Trust My Lug Nuts to an Impact Wrench Alone
Another tool that I swear by is my click-type torque wrench. Most people think torque specs are just for engine internals like when you are learning the trick to replacing a spark plug without stripping threads. However, over-tightening your lug nuts with an impact gun is a primary reason why your brake rotors keep warping every few months. Uneven clamping force on the wheel hub creates lateral run-out, which manifests as a brake pulse that feels exactly like a suspension failure. By torquing my wheels to the factory-spec 90 lb-ft every single time, I ensure the braking surface stays true. It is a five-minute habit that saves me from performing a brake service prematurely.
How do I maintain my suspension’s ‘factory-new’ feel for years?
Maintenance is a marathon, not a sprint. Beyond the visual checks, you have to manage the heat and friction that kill your vehicle’s mechanical components. Just as you would how to save your transmission from heat damage by keeping the fluid fresh, you need to keep your suspension bushings lubricated if they have grease fittings, and always the simple way to bed in new brake pads to avoid thermal shock to the system. Looking forward, I predict that by 2025, we will see cheap, Bluetooth-enabled vibration sensors that DIYers can clip to their control arms to get real-time health data on their dampers—essentially bringing pro-level telemetry to the average garage. For now, following the truth about why my car finally hit 200000 miles means staying disciplined with these small, tactile inspections. This weekend, grab a digital gauge and measure all four corners of your tires; you might be surprised by what the rubber is trying to tell you.
What Most Shop Manuals Forget to Mention
Over the years, I’ve realized that suspension health isn’t just about mechanical specs; it’s about the ‘feel’ you develop after enough miles. One big lightbulb moment for me was realizing that troubleshooting common auto repair issues often means looking at the environment, too. For instance, if your tires show weird wear only on the right side, check your local roads—constant drainage crowns can mimic alignment issues by forcing you to steer slightly left for miles. Also, remember that suspension parts are like a team; when you upgrade to stiffer struts, you’ll likely find that your old rubber bushings are the next thing to fail because they can’t handle the new pressure. It’s a cascade effect that I only truly understood after seeing the truth about why my car finally hit 200000 miles while staying ahead of the component wear curve.
The Reliable Gear That Lives in My Trunk
You don’t need a five-figure shop setup to be an expert. I swear by my digital tread depth gauge because it catches 0.2mm differences that my eyes miss during a standard car service checklist run. I also recommend picking up an infrared thermometer gun. After a long drive, if one shock is significantly cooler than the other, it’s not doing any work internally. For documentation, I always keep a copy of my car’s specific factory service manual rather than a generic guide—precision torque specs are the secret to a long-lasting tune up for peak performance. Finally, keep an eye on auto repair trends to watch in 2025 to see how DIY-friendly diagnostic apps are changing the game.
#IMAGE_PLACEHOLDER_E#
Taking Control of Your Ride Quality
At the end of the day, your car is a complex machine that communicates through vibration and rubber. By learning to ‘read’ your tires, you aren’t just saving money; you are taking responsibility for the safety of everyone in your cabin. Don’t let a small bounce turn into a major mechanical failure. Grab a flashlight, get on your knees, and see what your tread is trying to tell you. Have you ever had a ‘mystery vibration’ that turned out to be something completely different than what the mechanic first suggested? Let me know in the comments below!