
I remember standing on the shoulder of a busy highway, steam billowing from my hood like a malfunctioning smoke machine while my family gave me ‘the look.’ You know the one—the look that says, ‘I thought you fixed this.’ It was embarrassing. I had spent the previous weekend doing what I thought was a thorough tune-up, but I completely ignored that tiny, cheap valve responsible for regulating my engine’s temperature. I assumed it was fine because the car was relatively new, but that little thermostat had decided to stay shut, turning my engine into a localized pressure cooker. It’s a classic mistake, and honestly, one I’ve made more than once. Sometimes we focus so much on the big repairs that we forget the simple mechanical components that can ruin our entire day. Today, I want to save you from that roadside frustration by showing you how to verify your thermostat’s health before you ever bolt it back into your engine block. [image_placeholder_1]
Stop Guessing and Put Your Thermostat to the Test
Dealing with cooling issues is stressful. If you’ve noticed why your car takes forever to warm up in the morning, or conversely, if your needle climbs toward the red zone within minutes, you are likely staring down a thermostat problem. Most people just throw parts at the car and hope for the best, but that gets expensive fast. Instead of playing a guessing game, we are going to use some basic kitchen science. I used to be the guy who just replaced everything at once, but after a few ‘new’ parts failed right out of the box, I learned my lesson. You have to verify. Testing a thermostat in a pot of water is the only way to know for certain if it’s opening at the correct temperature or if it’s sluggish. It’s also the easy way to check if your thermostat is stuck open, which is just as annoying as one that’s stuck closed because it kills your fuel economy and leaves you shivering in the cabin.
Is boiling car parts in my kitchen actually a good idea?
I get the skepticism. My wife certainly wasn’t thrilled the first time she saw a greasy car part sitting next to the pasta pot. But here’s the truth: as long as you clean the thermostat first and use a dedicated old pot, it is perfectly safe and incredibly accurate. I once made the mistake of using a high-end digital meat thermometer that I actually needed for a barbecue later that afternoon—don’t do that. Keep your kitchen tools and your garage tools separate. However, the method itself is foolproof. According to the automotive experts at AAA, cooling system failure remains a leading cause of mechanical breakdown, and a simple $15 thermostat is often the culprit. By taking twenty minutes to do this test, you are essentially buying insurance against a blown head gasket. Have you ever been stranded because of a tiny part you could have checked yourself? It’s a humbling experience, but it’s how we learn. Before we dive into the step-by-step process, you should also know how to spot a coolant leak elsewhere in the system, because a healthy thermostat can’t do its job if the fluid level is low. Let’s get that water boiling and see what your thermostat is actually doing.
Clean Up Your Act Before the Boil
Before you even think about putting that thermostat in a pot of water, you need to treat it like a surgical instrument. If you are reusing your old one to see if it is still viable, it is likely covered in crusty, green or orange coolant residue. This gunk can insulate the copper wax element, giving you a false reading and making you think the part is bad when it’s just dirty. Take a soft wire brush and some brake cleaner to get it back to bare metal. This is a crucial step in any car service checklist because accuracy is everything in diagnostics. While you are at it, look for the temperature rating stamped right on the flange. Most thermostats are rated for 180°F or 192°F. Knowing this number is the difference between a successful test and a guessing game. If you can’t find the stamp, you might be looking at a cheap aftermarket part that has already failed you once. Taking the time to prep your parts is what separates a backyard tinkerer from someone performing a professional-grade tune-up for peak performance.
Suspend the Thermostat for Total Accuracy
The biggest mistake people make is dropping the thermostat directly onto the bottom of the pot. The metal on the bottom of your pot is significantly hotter than the water itself because it is in direct contact with the burner. If the thermostat touches the bottom, it will heat up prematurely and open way before the water actually reaches the target temperature. I learned this the hard way with an old Ford Ranger. I thought the thermostat was perfect, but it was just absorbing heat from the pan. To do this right, grab a piece of bailing wire or a coat hanger. Loop it through the bridge of the thermostat so it hangs freely in the middle of the water column. This ensures that the wax pellet is reacting only to the liquid temperature, much like testing your alternator with a multimeter requires isolated probes for a clean signal.
Watch for the Snap and the Scale
Now, fill your pot with enough water to fully submerge the part and turn up the heat. You need a high-quality cooking thermometer or an infrared temp gun to track the progress. As the water approaches the rated temperature, watch the small valve inside the thermostat. You are looking for a smooth, steady opening. It shouldn’t jerk or pop open suddenly. If it starts to open at 160°F but it’s rated for 192°F, your engine will run too cold, which is exactly why your car takes forever to warm up in the morning. On the flip side, if the water is boiling at 212°F and that valve hasn’t moved, that part belongs in the trash. I once spent three hours chasing a ‘mysterious’ overheating issue on a neighbor’s car only to find out the brand-new thermostat they bought was a ‘dud’ right out of the box. Since then, I never install a cooling component without verifying it first. This kind of due diligence is essential for troubleshooting common auto repair issues before they turn into a multi-thousand dollar engine rebuild. Once the water hits its peak, the valve should be open by at least an eighth of an inch. As the water cools down, the thermostat should close tightly. If it stays slightly cracked as the temp drops, it’s ‘lazy,’ and it will kill your fuel economy by preventing the engine from reaching its efficient operating temperature.
Even with a perfect test result, I’ve seen plenty of DIYers fail because they overlook the environment that thermostat lives in. Most people think a tune-up is just about changing spark plugs and air filters. However, in my years under the hood, I’ve found that the biggest threat isn’t always a mechanical part failing—it’s chemical warfare happening inside your radiator. Everyone says you just need to keep the fluid level up, but the pH balance of your coolant is what actually keeps your engine from eating itself from the inside out. If you’ve been troubleshooting common auto repair issues like mysterious overheating, you might be fighting electrolysis.
Wait, is my coolant actually conducting electricity?
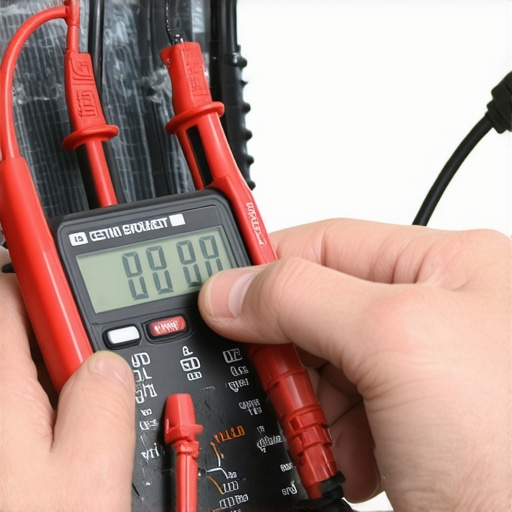
This is the hidden nuance that separates a master mechanic from a parts-changer. As coolant ages, its protective additives break down and it becomes acidic. It can actually start carrying a small electrical charge between different types of metal in your engine. This is called electrolysis, and it can pin a brand-new thermostat shut or erode your water pump blades until they are paper-thin. According to the Car Care Council, cooling system neglect is the leading cause of roadside breakdowns, yet almost no one checks their coolant with a multimeter. I always tell my friends that if your coolant looks like coffee creamer or is murky, you aren’t just looking at a car service requirement; you are looking at an engine in crisis.
Avoid the dreaded air pocket trap
Here is the ‘oops’ factor that kills many successful thermostat tests: the air pocket. When you drain your radiator to swap that part, air gets trapped in the high points of the engine. If that air sits right behind your thermostat, the wax element won’t feel the heat of the coolant, and it won’t open—even if it passed the boiling water test perfectly in your kitchen. This is a common reason why your car heater takes forever to warm up or why the temp gauge spikes immediately after a repair. You must ‘burp’ the system by running the engine with the radiator cap off and the heater on full blast to let those bubbles escape. I once saw a guy warp a cylinder head because he forgot this five-minute step. He thought he had a ‘dud’ part, but he really just had a ‘dud’ process.
Balance your performance and safety
Properly maintaining these small components is the real secret to making your engine last for decades. We often get distracted by brake service myths or shiny new performance parts, but the thermal management of your engine is the foundation of everything else. If the engine isn’t at the right temperature, your fuel maps will be off, your oil will thin out too much, and your internal components will expand at uneven rates. Have you ever fallen into this trap where a simple repair turned into a nightmare because of a tiny mistake like an air pocket or dirty coolant? Let me know in the comments below, because sharing these stories is how we all get better at keeping our rigs on the road.
I eventually got tired of the ‘burping’ method. It works, but it’s messy and imprecise. If you want to move beyond the backyard tinkerer stage and ensure you never have to deal with a trapped air bubble again, you need to invest in a vacuum coolant refiller. I personally use the UView Airlift because it uses shop air to pull a total vacuum on the entire system. If the vacuum holds, you know you don’t have a leak. If you open the valve and let it suck in the new coolant, it fills every nook and cranny without leaving a single pocket of air. This is the gold standard for any car service checklist that aims for perfection. It’s one of those tools that pays for itself the first time you don’t have to spend an hour waiting for bubbles to rise to the radiator neck.
Stop flying blind with your engine temperature
Another tool I never work without is a decent OBD2 scanner capable of displaying live data. Your dashboard temp gauge is often what we call a ‘dummy gauge’—it stays right in the middle whether the engine is 180°F or 220°F, only moving to the red when it’s already too late. By plugging in a scanner, I can see the exact degree the computer is reading. This is how I verify that my tune-up for peak performance actually worked. If I see the temp steady at 192°F while idling, I know my thermostat is doing its job. This level of data is also vital for troubleshooting common auto repair issues like a failing electric fan or a partially clogged radiator that only shows symptoms under load.
How do I keep my cooling system healthy for years?
The secret is consistency and chemistry. I tell everyone who asks to stick to the manufacturer’s specified coolant—don’t just grab the ‘universal’ bottle because it’s on sale. According to technical documentation from Gates, specifically their bulletins on cooling system failures, mixing incompatible coolants can lead to ‘gelation’ or silicate dropout, which effectively turns your coolant into a thick sludge that no thermostat can overcome. To maximize your car’s lifespan, flush the system every three to five years depending on the fluid type. This prevents the pH shift that causes the electrolysis we discussed earlier. 
Why EV batteries are changing the game
Looking ahead, the way we think about cooling is shifting rapidly. As we see more auto repair trends to watch in 2025, we are seeing thermal management become even more complex with electric vehicles. Instead of just cooling an iron block, we are now managing massive battery arrays that require liquid cooling to stay within a very narrow temperature window for safety and range. The precision we use today to test a simple thermostat is just the beginning of the diagnostic skills needed for the next generation of cars. If you can’t master a $20 mechanical valve today, you’ll be lost when you have to diagnose a multi-stage thermal management loop on a modern hybrid. I challenge you to grab a cheap OBD2 dongle this weekend and actually monitor your real-time temps during your commute; you might be surprised by what your ‘perfectly fine’ car is actually doing under the hood.
[image_placeholder_final]
The Hardest Lesson I Learned While Chasing Overheating Issues
Over the years, I’ve realized that the most expensive repairs usually start with the smallest oversights. One lightbulb moment for me was realizing that a “new” part is just a part that hasn’t been tested yet. I once spent a whole weekend pulling a radiator because I assumed my new thermostat was perfect—it wasn’t. Another huge realization was that the cooling system is a closed ecosystem. If you’ve ever wondered why your engine temp drops when you turn the heater on, you’re seeing that ecosystem in action. Finally, I learned that you should never rush the “burping” process. Air trapped in the head will destroy an engine faster than almost anything else. It’s often the difference between a simple tune-up or a major repair later down the line.
My Trusted Arsenal for Cooling System Success
You don’t need a professional shop to do professional work, but you do need the right data. I always keep an infrared temp gun in my top drawer; it’s the only way to find cold spots in a radiator. I also swear by a vacuum filler tool; it removes the guesswork of air pockets entirely. For everything else, a basic OBD2 Bluetooth dongle paired with a phone app is essential. It lets you see the real-time digital readout that your dashboard gauge hides. These tools are the backbone of how I maximize your car’s lifespan with expert tune-up strategies every single time I open the hood.
It is Time to Stop Guessing and Start Testing
Working on your own vehicle can be intimidating, but there is an incredible sense of pride that comes with knowing your cooling system is rock solid because you verified it yourself. Don’t let a $15 valve be the reason you end up on the side of the road. By taking the time to test your thermostat before installation, you are taking the driver’s seat in your car’s maintenance. You’ve got the knowledge, the method, and the mindset now—so get out there and get your hands dirty! The hidden sign that your water pump is about to fail might be subtle, but a well-maintained thermostat gives you the baseline you need to spot it. Have you ever been burned by a brand-new part that failed right out of the box? Let me know in the comments below!