
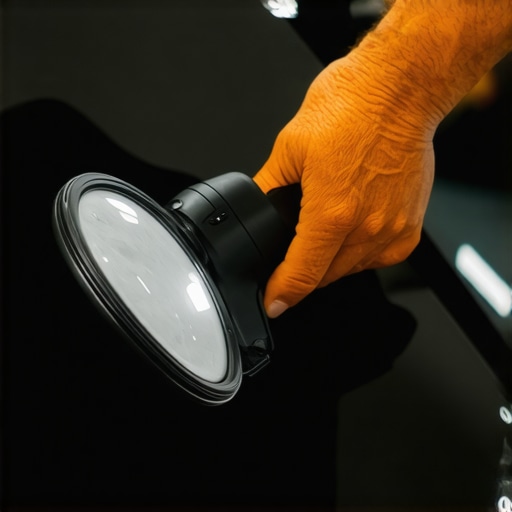
I’ll never forget the afternoon I decided to “quickly” fix the bubbling tint on my old sedan. I thought I could just grab a corner and pull. Big mistake. Within ten minutes, I had a jagged strip of purple film in my hand and a rear window that looked like it had been smeared with industrial-strength syrup. I couldn’t see out of my rearview mirror, and every piece of dust in the garage was suddenly attracted to my glass like a magnet. That’s the moment I realized that window tint removal isn’t just about the film; it’s a battle against the adhesive. If you’ve ever felt that sinking feeling in your stomach looking at a ruined window, you aren’t alone. Today, I’m going to show you exactly how to win that battle so you can get back to focusing on essential maintenance instead of scrubbing glue until your fingers bleed.
Why Old Window Tint Turns Into a Sticky Disaster
The biggest blunder I made early on was reaching for a box cutter. I figured a sharp blade would just slice through the mess. Instead, I ended up with tiny scratches on the glass and a defroster grid that was essentially toast. It’s a common auto repair issue people create for themselves when they’re in a rush. The real secret isn’t force; it’s heat and moisture. When you use a fabric steamer, you aren’t just pulling the plastic; you’re actually breaking down the chemical bond of the adhesive. According to the International Window Film Association, improper removal can permanently damage the tempered glass or the sensitive electronic components housed in modern windows. By taking your time with steam, you’re essentially “melting” the glue away from the glass so it stays on the film where it belongs. This saves you the headache of later wondering why your car smells like chemicals after you’ve used a gallon of harsh adhesive remover.
Is tackling this at home actually worth the headache?
I get the skepticism. You’re probably thinking, “Why not just pay a pro?” Well, if you’re already staying on top of your car service checklist, you know that doing things yourself can save a fortune—provided you do them right. The trick I’m sharing doesn’t require specialized tools, just patience and the right technique. I’ve seen people spend $200 for a job that takes forty-five minutes once you know the rhythm. Have you ever tried to peel your own tint and ended up with a gummy, opaque mess that made you want to sell the car to junk car buyers in Charlotte? If so, tell me your horror stories—I’ve probably lived through them too. We’re going to walk through the prep work next, ensuring your glass stays pristine and your interior remains dry while we work. This isn’t just about aesthetics; it’s about making sure your vehicle remains safe and clear for every mile ahead.
Protect Your Interior From a Localized Rainstorm
Before you even plug in your steamer, you have to realize that you’re about to introduce a lot of moisture into a very small space. I learned this the hard way on a 2012 Camry when I got too aggressive with the wand and ended up with water pooling inside the door panel. A week later, my speakers started crackling—a classic case of how a simple DIY job can spiral into electrical issues if you aren’t careful. Now, I lay down thick beach towels across the upholstery and stuff microfiber cloths into the window tracks. This acts like a dam, catching the “sweat” from the steamer before it can migrate into your door’s electronics. Think of it as a car service checklist item: protect the cabin first, or you’ll be fixing more than just glass later.
Let the Steam Melt the Bond
The goal is to get the steam between the film and the glass. I start at a top corner, holding the steamer about an inch away from the surface for about thirty seconds. You’ll see the film start to go limp—that’s your cue. Use your fingernail to catch a corner. As you pull slowly, keep the steam directed right at the tearing point where the film meets the glass. It should feel like you’re peeling a soft banana, not a stubborn sticker. If you feel resistance, stop and apply more heat. If you pull too hard, the film will snap, leaving you with a thousand tiny shards to pick off individually. This patience is what separates a hack job from a result that looks like it came from a shop specializing in expert tune-up strategies.
Wrestle the Leftover Glue to the Ground
Even with perfect steaming, you’re likely to have a few patches of sticky residue. This is where most people lose their cool and start hacking away with a razor. Instead, reach for a specialized adhesive remover or a high-concentration isopropyl alcohol mix. Spray it on and let it sit for a minute—it needs time to digest the glue. It’s a similar logic to removing road tar without ruining your paint; the chemical reaction does the work so your muscles don’t have to. Use a fresh plastic scraper to push the softened goo into a pile.
Defeat the Rear Window Final Boss
The rear window is the final boss because of those delicate defroster lines. If you use a metal blade here, you’re basically cutting the circuit and ending the functionality of your rear defogger. When I did my first rear window, I was so focused on the glue that I didn’t notice I’d sliced through three lines until winter hit and my window stayed foggy. That’s a costly auto repair issue that’s entirely avoidable. Keep the steamer moving constantly to avoid overheating one spot, which can actually stress the tempered glass. I’ve found that a quick water spray test, much like how you’d identify a squealing belt, helps reveal exactly where the clear adhesive is still hiding on the glass by showing where the water beads differently. Once the glass is smooth to the touch, you’ve successfully cleared the way for a fresh start.While we’re on the subject of precision, I see so many DIYers treat a tune-up like a simple grocery list of parts. They swap plugs and filters then wonder why their engine still stumbles. In my experience, a modern ‘tune-up’ has almost nothing to do with parts and everything to do with data. People often assume that if the ‘Check Engine’ light isn’t on, everything is perfect. That’s a massive misconception. Most performance-robbing issues, like a lazy oxygen sensor or a clogged fuel trim, won’t trigger a code until the car is practically gasping for air. This is where professional diagnostics actually pay for themselves. If you are chasing a weird shudder, don’t just throw parts at it; look at the live data streams.
Why the Standard 100,000-Mile Tune-Up is Often a Myth
I’ve spoken to dozens of technicians who agree that waiting until the odometer hits six figures for a ‘major’ service is playing with fire. The National Institute for Automotive Service Excellence (ASE) notes that modern vehicle performance relies heavily on software calibrations and sensor cleanliness, which can degrade long before a spark plug technically ‘fails.’ Relying on those long intervals is a common brake service myth applied to the whole engine. For example, ignoring your ignition system until a failure occurs can lead to unburnt fuel hitting your catalytic converter—a mistake that turns a $50 maintenance task into a $1,500 repair. I always lean toward expert tune-up strategies that involve cleaning the throttle body and mass airflow sensor every 30,000 miles to keep the engine breathing correctly.
Don’t Ignore the Hidden Slide Pins During Your Next Brake Job
Another area where I see ‘advanced’ hobbyists fail is in the details of the braking system. Most people swap pads and rotors and call it a day. But if you aren’t cleaning and re-greasing your caliper slide pins with high-temp silicone paste, you’re setting yourself up for failure. Seized pins are the real reason your rear brakes wear faster than fronts or why your car pulls to one side. It’s a tiny detail that takes five minutes but determines whether your brakes last two years or six months. Also, be wary of the ‘oops’ factor when working near the engine: stripping a spark plug hole is the ultimate weekend-ruiner. I always recommend the trick to replacing a spark plug without stripping threads by using a piece of rubber hose to hand-start the plug.
Why does my car still idle rough after replacing all the common parts?
This is the question that separates the pros from the parts-changers. If you’ve done the plugs, filters, and wires but the idle is still ‘lumpy,’ you’re likely dealing with a vacuum leak or a carbon-choked EGR valve. Have you ever fallen into this trap where you replaced everything and the problem stayed? Let me know in the comments. Often, it’s not the parts you replaced, but the ‘ghost’ in the machine—a small rubber vacuum line that has cracked from age. You can usually find these by using the simple way to check for vacuum leaks with smoke. Taking the time to master these nuances doesn’t just save money; it ensures your vehicle remains reliable for the long haul, much like the essential maintenance we discussed earlier. Master the small things, and the big repairs will take care of themselves.I used to think a bigger toolbox meant a better mechanic, but experience taught me that it is really about having the *right* gear for the specific battle you are fighting. If you are serious about moving beyond basic oil changes and into the realm of true vehicle mastery, you need to stop guessing and start measuring. I’ve seen too many people spend hundreds on sensors only to realize later they had a simple wiring break. That is why I never touch a modern engine without a bidirectional scan tool. Unlike those cheap $20 readers that just spit out a code, a real diagnostic tool lets you command the car to perform actions—like firing an individual fuel injector or cycling the ABS pump. This is how I finally figured out how to tell if your computer is giving you a false error code before I wasted a Saturday replacing parts that weren’t broken.
The Gear That Separates Mechanics from Parts-Changers
My most-used tool isn’t even a wrench; it’s a high-quality multimeter and a dedicated brake fluid tester. We often obsess over pad thickness, but we ignore the chemical health of the fluid itself. According to the SAE standard J1703, brake fluid is hygroscopic, meaning it actively sucks moisture out of the air. Once that water content hits 3%, your boiling point drops off a cliff, and your internal components start to rust. I use a digital tester to check the moisture level every time I rotate my tires. It’s a tiny step, but it prevents that terrifying moment when you realize the hidden culprit behind a spongy brake pedal is actually internal corrosion. If you want to avoid understanding brake system repairs through a massive repair bill, buy a $15 tester and check your reservoir today.
Flush Your Brake Fluid Before the Pedal Goes Soft
While we are on the subject of fluids, let’s talk about the ‘forever’ fluid myth. There is no such thing. Whether it is your transmission or your cooling system, every chemical has a service life. I’ve found that using a vacuum bleeder or a power pressure bleeder makes a solo brake flush a twenty-minute job rather than a two-person ordeal. It ensures no air bubbles remain in the lines, which is often the real reason your car pulls under heavy braking. I predict that by 2030, most of these manual checks will be replaced by built-in sensors that alert your phone when fluid conductivity changes, but until then, we have to be the eyes and ears of our machines. 
How do I keep these complex systems healthy for the long haul?
The secret isn’t just doing the work; it’s the timing and the data. I keep a digital log of every ‘live data’ snapshot from my scanner when the car is running perfectly. That way, when a stumble develops, I have a baseline to compare it to. This approach is central to expert tune-up strategies. It’s how I’ve managed to keep my daily driver humming while others are constantly visiting the shop for troubleshooting common auto repair issues. If you really want to stay ahead of the curve, I challenge you to perform a ‘smoke test’ on your intake system this weekend. You might be surprised to find a tiny vacuum leak that’s been robbing you of power for months. This kind of proactive maintenance is the truth about why my car finally hit 200,000 miles without a major breakdown. Don’t wait for a light on the dash to tell you something is wrong; use the tools available to see the problem coming a mile away.
Hard-Won Truths from My Years Under the Hood
The biggest lightbulb moment I ever had wasn’t about a specific engine part; it was realizing that patience is an actual tool you have to pull out of the drawer. When I first started doing my own car service, I thought speed was a sign of skill. Now I know that the guy who takes five minutes to clean a mounting surface is ten times faster than the guy who has to do the whole job over because of a leak. Another hard truth? Diagnostics are cheaper than guesses. Throwing a $200 sensor at a problem without testing is just gambling with your money. Finally, never underestimate the power of documentation. I used to think I’d remember where every bolt went, but now I take photos of everything—especially when staying updated on auto repair trends to watch in 2025 as vehicle systems become more digital. These moments of focus are what prevent a simple repair from becoming a disaster.
The Gear I Trust to Get Me Home
If you want to move beyond basic maintenance, you need a toolkit that builds confidence. I personally swear by a bidirectional scan tool. It’s the difference between seeing a generic code and actually talking to the car’s computer. I also never start a project without a high-quality torque wrench; ‘snug’ is not a torque spec, and over-tightening is how you end up with a broken stud and a ruined Saturday. For those who want to see how regular tune-ups improve fuel efficiency, a simple vacuum gauge is an old-school but incredibly reliable way to see what’s happening inside your engine. And if you’re feeling brave, you can even detect a small vacuum leak using a simple cigar to find those elusive cracks that modern scanners might miss.
Master Your Machine One Step at a Time
At the end of the day, your vehicle is more than just a collection of metal and plastic—it’s the vessel for your daily life. Taking the time to understand the nuances of brake service or achieving peak performance through careful maintenance gives you a sense of agency that you just can’t get from a dealership waiting room. Seeing a friend lose a gearbox is exactly why I’ll never skip a transmission fluid change again, and I want you to have that same proactive mindset. Don’t be afraid to get your hands dirty; every expert you see was once a beginner staring at a lumpy idle and wondering where they went wrong. You’ve got the tools and the knowledge—now go out there and show your car some respect. Have you ever found a ‘ghost’ in your machine—a tiny, cheap part that caused a massive mechanical headache? Let me know in the comments below!