
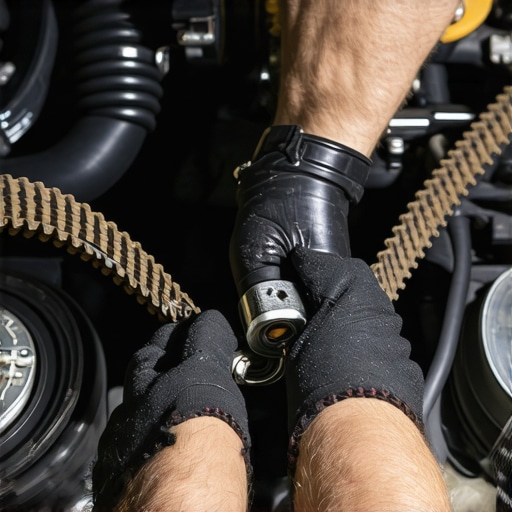
I remember the first time my old sedan started chirping like a distressed bird. I ignored it for weeks, thinking it was just morning moisture. Then, while merging onto the highway—SNAP. The power steering died, the battery light flashed, and I was muscle-manhandling two tons of steel to the shoulder in a panic. It was terrifying, expensive, and completely avoidable. If you have ever wondered why your car whines like a jet engine when you accelerate, you are likely staring at a failing serpentine belt that is about to ruin your Tuesday.
Stop Ignoring That Squeal Under Your Hood
Today, I am going to show you how to swap that belt yourself before it leaves you stranded. Most people think engine work requires a PhD and a thousand dollars in tools, but this is one of those rare maintenance tasks that looks harder than it actually is. By the time we are done, you will realize that a quick tune-up for peak performance doesn’t always involve a trip to the local shop. According to the National Institute for Automotive Service Excellence (ASE), most modern EPDM serpentine belts can last up to 100,000 miles, but they often fail much earlier due to pulley misalignment or extreme heat. I learned that the hard way when I once tried to ‘save time’ by not checking my tensioner, only to have the brand-new belt shred itself in three days. Do not be like younger me. Take the 20 minutes to do it right. Have you ever been stuck on the side of the road because of a simple five-dollar part failing? Tell me your horror stories in the comments!
Can a Normal Person Really Do This in 20 Minutes?
I know what you are thinking. You are worried about getting the routing wrong or not having enough muscle to move the tensioner. Trust me, if you can use a wrench, you can do this. The secret is all in the diagram. [IMAGE_PLACEHOLDER] When you start troubleshooting common auto repair issues, you realize the serpentine belt is the literal lifeline of your engine, powering your alternator, power steering, and air conditioning. If you notice symptoms like your temperature gauge spiking because the water pump stopped turning, you are already in the danger zone. Checking your belt should be a standard part of your ultimate car service guide routine. It is a simple matter of leverage and a little bit of patience. We are going to walk through the exact steps to ensure your belt is seated perfectly so you can drive with confidence again.
Draw Your Map Before Touching Anything
The biggest mistake you can make—and I know this because I did it on an old 2004 sedan—is assuming you will remember how the belt wraps around the pulleys. It looks like a simple loop, but it is actually a geometric puzzle designed by someone who hates free time. I once tried to eyeball the routing on an old truck without a diagram; I ended up wrapping the belt around the fan shroud, and spent an hour sweating in the sun just trying to untangle my ego from the engine bay. Always check for a routing sticker on the radiator shroud first. If it is missing, grab your phone and snap three different angles of the current setup. This is why including a belt inspection in your car service checklist is non-negotiable; you need to know what ‘right’ looks like before things go wrong.
Put the Leaning Tower of Leverage to Work
To get the old belt off, you have to fight the tensioner. Think of the tensioner like a heavy security door with a very stiff spring—you cannot just nudge it; you have to lean into it. Most cars require a 14mm or 15mm wrench, or better yet, a long breaker bar. When you apply pressure to the tensioner bolt, the pulley will swing, creating slack. If you find your steering wheel feels heavy or you hear a chirp, that tensioner might be losing its strength. Slide the belt off the smoothest pulley first (usually the idler pulley) because it has no ‘lips’ to catch the belt. Once that slack is there, the rest of the belt will practically fall into your lap. This is much like a proper expert tune-up strategy where you remove the tension of the old parts before introducing the new ones.
Spin the Pulleys While You Have the Chance
With the belt removed, your engine pulleys are ‘naked’ and free-spinning. This is the perfect moment to play detective. Spin the alternator, the water pump, and the AC compressor by hand. They should spin silently and smoothly, like a well-oiled bicycle wheel. If you hear a dry, metallic grinding sound, you might be looking for signs your water pump is about to fail or a bearing going bad in the alternator. If the alternator feels gritty, you should test your alternator with a multimeter once you get the car running again. Replacing a belt on a seized pulley is like putting a new band-aid on a broken leg—it won’t solve the underlying disaster. I once ignored a slightly ‘crunchy’ idler pulley only to have it melt through my brand-new belt in less than fifty miles.
The Secret to the Perfect Seat
Now, thread the new belt through the pulleys following your photo or diagram. The most critical step is ensuring the ribs of the belt sit perfectly in the grooves of the pulleys. If the belt is even one ‘tooth’ off, it will shred itself the moment you turn the key. It is the same precision required when you are learning the proper way to break in new brake pads; alignment is everything. Use your fingers to feel the back side of the pulleys where you cannot see. If you notice power steering fluid is foaming or leaking onto the pulleys, clean it off immediately with brake cleaner, as oil and rubber are mortal enemies. Once everything is aligned, pull the tensioner one last time, slide the belt over the final pulley, and let the tensioner take up the slack. Double-check every single pulley before you even think about touching the ignition.
Everyone thinks a tune-up is just about swapping spark plugs and filters, but the real expert tune-up strategy is looking at the system as a whole. Most people get this wrong by treating individual parts like islands. If you are only replacing the belt when it snaps, you are already behind the curve. In my experience, the ‘wait until it breaks’ mentality is the fastest way to turn a fifty-dollar DIY job into a three-thousand-dollar engine rebuild. You need to look for the nuances that the average driver misses.
Stop Trusting the 100,000-Mile Myth
Common wisdom—and even some owner’s manuals—will tell you that modern EPDM belts are good for 100,000 miles. I am here to tell you that is a dangerous gamble. While the material is more durable than old-school neoprene, it does not crack the same way. Instead, the grooves simply wear deeper, much like the tread on a tire. A study by the Car Care Council found that nearly 80% of vehicles on the road failed at least one component of a basic safety inspection, with belts and hoses being top offenders. By the time you hear a noise, the belt has likely already lost its ability to properly grip the pulleys. This is why I always recommend a car service checklist that includes a visual depth gauge check every 50,000 miles, regardless of what the manual says.
Is That Morning Chirp Really Just a Stretched Belt?
This is the question that separates the driveway mechanics from the pros. Often, that annoying morning squeak isn’t the belt stretching; it is a microscopic misalignment in one of your accessories or a bearing beginning to seize. If you have ever wondered if your brake squeak is serious or just morning moisture, you know how confusing car noises can be. The same logic applies to your engine bay. If the noise persists after a belt change, you likely have a ‘ghost’ in your pulleys. [IMAGE_PLACEHOLDER_C#] One trap I see DIYers fall into constantly is neglecting the pulley grooves themselves. If you don’t clean out the tiny pebbles and rubber dust from the pulley teeth with a wire brush, your brand-new belt will be ‘profiled’ by the old debris within miles, leading to premature failure. Have you ever fallen into this trap? Let me know in the comments!
Avoid the Fatal Mistake of Neglecting Hardware
The same ‘good enough’ attitude plagues brake jobs. Many people believe that as long as they throw on new pads, they have completed a successful service. This is one of the most common brake service myths that leads to vibrating steering wheels and poor stopping power. Professional brake system repairs require replacing the clips, lubing the slide pins, and flushing the old, moisture-heavy fluid. Ignoring the hardware is like putting on a tuxedo with muddy boots; the main part looks great, but the foundation is a disaster. When you are troubleshooting common auto repair issues, remember that the smallest, cheapest parts—like a five-cent cotter pin or a dollar’s worth of silicone grease—are often what keep you safe on the highway.
Precision Beats Muscle Every Time
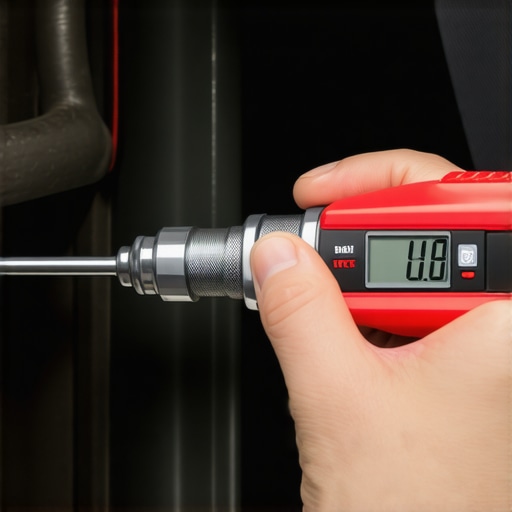
For years, I thought ‘tight enough’ was a valid unit of measurement. I would crank down on a bolt until my veins popped, thinking I was doing my car a favor. I was wrong. Modern engines are increasingly built with aluminum and composite materials that do not forgive over-tightening. If you want to master a tune-up for peak performance, you need to stop guessing. This is where I recommend investing in a digital torque adapter. I personally use a 1/2-inch Quinn model because it turns any standard breaker bar into a high-precision instrument that beeps when you hit the exact foot-pound. According to SAE International (Technical Paper 2021-01-0985), even a 10% deviation from manufacturer torque specs on critical engine fasteners can lead to thermal cycling fatigue and eventual gasket failure. This is often the real reason behind those ‘mystery’ oil leaks people blame on bad luck.
The Tool That Changed My Garage Game
Beyond torque, the one item that stays in my pocket during every ultimate car service guide routine is a high-end OBD2 scanner with live data streaming. Most people buy the cheap twenty-dollar readers that just clear codes, but that is only half the battle. I use a bi-directional scanner that lets me ‘force’ the car to run tests, like cycling the ABS pump or checking the fuel trim in real-time. This is how you spot how regular tune-ups improve fuel efficiency and safety before the check engine light even thinks about turning on. If you can see your oxygen sensors lazily responding to throttle inputs, you can fix the issue before it ruins your catalytic converter.
How Do I Maintain My Car’s Longevity Without Breaking the Bank?
The secret to the secret to getting 200,000 miles out of your original engine isn’t some magic oil additive; it is consistency and documentation. I keep a physical logbook in my glovebox—yes, a real one with paper. Every time I touch the car, I write down the date, mileage, and the brand of part I used. This allows me to track patterns. For example, if I notice my brake pads are wearing unevenly every 15,000 miles, I know I have a sticking caliper hardware issue that a simple pad swap won’t fix. It is about moving from reactive repairs to predictive maintenance. This is the same mindset needed for professional brake system repairs; you are looking for the story the parts are telling you about the rest of the vehicle.
The Future of Your Home Driveway
Looking ahead, the DIY landscape is shifting toward software. As we look at auto repair trends to watch in 2025, we are seeing more ‘locked’ modules that require cloud-based authentication just to bleed the brakes. This is why you need to know how to tell if your local mechanic actually has the tools for a proper ADAS calibration. Soon, the most important tool in your chest won’t be a wrench—it will be a tablet. I predict that within five years, ‘Right to Repair’ battles will move from physical parts to software keys. My advice? Get comfortable with digital diagnostics now. Go out this weekend and try to pull the ‘Live Data’ on your car’s fuel system; learning to read those graphs is the single best thing you can do for your car’s future.
The Three Mistakes That Almost Cost Me My Engine
After years of turning wrenches, I’ve realized that the “easy” jobs are usually where the biggest disasters hide. First, never assume a new belt fixes a bad noise; if you don’t clean the pulley grooves with a wire brush, you’re just putting a fresh bandage on a dirty wound. Second, I learned the hard way that modern belts don’t crack like old rubber—they wear down internally like tire tread, making them deceptively dangerous. Finally, always remember that regular tune-ups improve fuel efficiency and safety because they force you to look at the small details, like vacuum leaks or frayed wires, before they become highway emergencies.
My Essential Driveway Diagnostic Toolkit
If you want to stop guessing and start fixing, you need more than just a set of sockets. I swear by my digital torque adapter because it removes the “tight enough” guesswork that leads to stripped threads and snapped bolts. I also keep a bi-directional scanner handy to see what the car’s computer sees in real-time. For anyone looking into auto repair trends to watch in 2025, a tablet and a high-speed scanner are becoming just as vital as a breaker bar. Lastly, don’t buy into brake service myths that claim you only need new pads; always keep a tub of high-temp silicone grease for your slide pins to ensure your stopping power remains consistent and quiet.
Take Control of Your Commute Again
Car maintenance can feel overwhelming, but it is truly the only way to ensure your vehicle survives the long haul without draining your bank account. When you take the time to understand your engine’s unique rhythm, you aren’t just a driver anymore—you’re a steward of your own safety. If you ever feel stuck or need professional advice on a complex engine or brake system repairs, do not hesitate to reach out. You have the tools, the knowledge, and now the plan. It’s time to get your hands a little dirty and keep that car on the road for another 100,000 miles. Have you ever had a “simple” repair turn into a weekend-long project because of one stuck bolt? Let me know your biggest DIY hurdles in the comments below!