
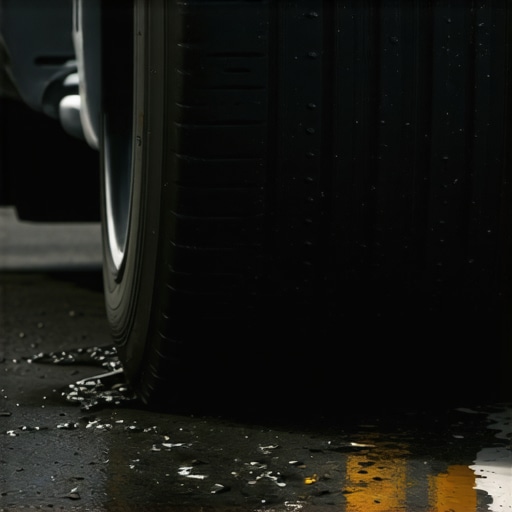
The jolt was so violent I thought I’d snapped an axle. I was just turning into my driveway—a transition I’ve made thousands of times—when the front end of my sedan hit the curb at five miles per hour and… BANG. It didn’t bounce. It didn’t absorb. It just slammed. My teeth rattled, my coffee jumped out of the cup holder, and my dashboard groaned in a way that told me my suspension had officially checked out. If you’ve felt that sickening “metal-on-metal” sensation lately, your struts aren’t just worn; they are bottoming out. That means the internal valves or the gas charge that usually keeps your car floating has finally given up the ghost.
Stop Ignoring That Bone-Jarring Thud Every Time You Hit a Bump
[IMAGE_PLACEHOLDER]
I’ll be the first to admit it: I tried to stretch my factory struts way longer than I should have. I kept telling myself the ride was just getting “sportier” or that the roads in my neighborhood were just getting worse. But the truth is, worn suspension is a slow creeper. You don’t notice the gradual loss of control until you’re suddenly white-knuckling the steering wheel because your car wanders across the lane at high speeds. It’s like boiling a frog; the ride quality degrades so slowly that you adapt to the bounce until it becomes dangerous. I remember a rainy Tuesday when I tried to take a sharp turn and the front end just plowed straight instead of gripping because my blown struts couldn’t keep the tires pressed firmly against the pavement.
When your struts are bottoming out, they’ve lost the ability to resist the weight of your vehicle during a compression. Instead of the hydraulic fluid and valving doing the work, the strut reaches the end of its travel and your car literally slams into the rubber “bump stops.” It’s a jarring, visceral experience that ruins the joy of driving. According to safety data from industry experts like Monroe, worn shocks and struts can increase your braking distance by up to 10 feet when traveling at 60 mph—that’s the difference between a heart-pounding close call and a trunk full of someone else’s bumper. Today, I’m going to show you how to spot the “point of no return” so you can get back to a smooth, safe ride.
Is Replacing Struts Actually Worth the Massive Bill?
Look, I get the skepticism. Suspension work isn’t exactly “pocket change,” and it’s incredibly tempting to think you can just “live with it” for another season. Early in my DIY days, I made the expensive mistake of waiting too long. Because my struts weren’t dampening the movement anymore, my tires were forced to take all the abuse. This led to “cupping”—a weird, wavy wear pattern on the tread—that ruined a brand-new set of tires in less than six months. By trying to save a few hundred bucks on a scheduled car service, I ended up spending double on tires and an alignment.
If you aren’t sure if your suspension has reached its limit, you can try the simple test for worn-out shocks using your own body weight. It only takes a minute in your driveway and usually tells you everything you need to know about the health of your dampers. Have you ever felt like your car was continuing to bob up and down like a boat long after you hit a dip in the road? That’s a classic sign your struts have left the building. One of the most annoying symptoms I dealt with was a mysterious noise that sounded like a loose bolt. I spent hours poking around under the hood before I learned how to use your ears to find a suspension clunk. Tell me, have you noticed your car sitting lower than it used to, or perhaps noticed a strange oily residue on the body of the strut itself? It is better to catch these signs now before your commute becomes a daily endurance test.
Choose the Right Parts Before You Start Tearing Things Apart
If you’re doing this in your driveway, I highly suggest going with “loaded” struts. Think of it like buying a pre-built PC instead of soldering the motherboard yourself. A loaded strut comes with the spring, the mount, and the hardware already assembled. When I did my first suspension job on an old SUV, I tried to save fifty bucks by buying just the strut cartridge. I spent four hours fighting a sketchy spring compressor that looked like it was going to snap at any second. It was terrifying and completely not worth the stress. Plus, getting everything fresh ensures you maximize your cars lifespan with expert tune up strategies rather than putting new parts on tired, saggy springs.
Safety is the Difference Between a Repair and a Hospital Visit
You’re working with thousands of pounds of steel. Never, ever trust a floor jack by itself. Once you have the car up, set it on high-quality jack stands. I usually give the car a good “shove test” while it’s on the stands before I even take the wheels off. If it’s going to fall, I want it to fall while I’m standing next to it, not under it. While the wheels are off, check your car service checklist to see if anything else is failing. It’s the perfect time to look at your brake lines. I once found a bubble in a line that was about to pop, and I only saw it because the strut was out of the way. You might even how to spot a collapsed brake hose in seconds just by feeling the flexibility of the rubber.
#IMAGE_PLACE_HOLDER_B#
Get Your Hands Dirty with the Teardown
Start by dousing every bolt in penetrating oil. Modern cars use “pinch bolts” or large through-bolts at the bottom of the strut. If you’re in a rust-belt state, these will be your mortal enemies. I remember a particularly stubborn bolt on a sedan that simply refused to budge. I ended up using a breaker bar with a six-foot piece of pipe for leverage. When it finally “cracked” loose, it sounded like a gunshot. Once those lower bolts are out and the sway bar link is disconnected, you just have three small nuts holding the top mount into the tower. Support the lower control arm so it doesn’t flop down and stretch your CV axle or brake lines—trust me, replacing an axle because you were lazy with a bungee cord is a mistake you only make once.
Why the Job Isn’t Over Until the Alignment is Done
You might think you’re a hero because the car doesn’t go “thud” anymore, but the geometry of your front end is definitely messed up now. Even if you marked the bolts, the new strut will sit slightly differently than the old, worn-out one. If you skip the professional alignment, you’ll how to tell if your wheel alignment is actually off when your steering wheel is crooked and your tires start screaming on every turn. A proper tune up your car for peak performance always includes a final check of the steering angles. It ensures that the money you just spent on struts doesn’t get wasted on a new set of tires in three months.
Most people think they’ve mastered the brake job once they’ve swapped the pads and rotors, but there’s a persistent myth that even seasoned grease monkeys fall for: the “warped” rotor. You’ve probably felt that steering wheel shimmy under braking and assumed the heat literally bent the metal. According to technical white papers from braking experts like StopTech, true rotor warping is incredibly rare in street vehicles. What you’re actually feeling is uneven pad deposition—essentially, bits of brake pad material have fused to the rotor surface unevenly. If you don’t address this, why your brake rotors keep warping every few months will remain a frustrating mystery. It’s not a metallurgy failure; it’s a chemistry problem.
Why do my brand-new rotors still pulse after a month?
The “oops” factor usually happens during the first twenty miles. Most drivers finish a repair and immediately go for a normal drive, but you absolutely must perform a proper “bed-in” procedure. This involves a series of controlled stops to transfer a thin, even layer of friction material from the pad to the rotor. If you skip this, or if you sit at a stoplight with red-hot brakes immediately after a hard stop, you’ll create “cementite” spots—hard patches that cause that rhythmic pulsing. I’ve seen people throw away perfectly good parts because they didn’t know the simple way to bed-in new brake pads. It is a nuanced step that separates a professional job from a weekend hack.
#IMAGE_PLACE_HOLDER_C#
Let’s dig deeper into the hydraulics, because this is where the real danger hides. Everyone checks the pads, but almost no one checks the hygroscopic nature of brake fluid. Brake fluid is designed to absorb water, which lowers its boiling point. If you live in a humid climate and haven’t flushed your system in two years, that moisture can turn into steam under heavy braking, leaving you with a pedal that goes straight to the floor. If you’ve ever wondered the hidden culprit behind a spongy brake pedal, it’s rarely the mechanical parts and usually the chemistry of the fluid itself.
In my early years, I once ignored a slight “squish” in the pedal, thinking I just needed a general tune up your car for peak performance by focusing on the engine. I ended up sailing through a stop sign because the fluid had boiled. It’s a terrifying lesson in why understanding brake system repairs involves more than just turning wrenches. You have to respect the fluid. Have you ever fallen into the trap of thinking a “pulsing” pedal meant you needed new rotors when a good cleaning would have fixed it? Let me know in the comments below.
Beyond the pads and rotors, the real secret to a long-lasting repair lies in the tools you use and the precision you apply. I don’t just rely on a cheap wrench set I found in the trunk; if you’re serious about this, you need a high-quality digital torque wrench. Modern suspension components often use “torque-to-yield” bolts—single-use fasteners that you tighten to a specific spec and then turn an additional ninety degrees to stretch the metal for a permanent hold. If you just guess, you risk the bolt snapping or backing out while you’re on the highway. I also swear by my bidirectional scan tool. Most people think a check engine light is an automatic death sentence for their wallet, but often it’s just a sensor glitch. Learning how to tell if your computer is giving you a false error code can save you thousands in unnecessary “parts cannon” repairs where you replace everything except the actual problem.
The Gear That Separates Amateurs From Pros
When it comes to your electrical system, a basic multimeter is your best friend. I use mine to check for parasitic draws that kill batteries overnight. It’s also the only way to verify that your alternator is actually charging the battery and not just spinning uselessly. Don’t fall for the brake service myths that suggest you can’t do this yourself; with a little investment in a pressure bleeder, you can flush your own lines in fifteen minutes without needing a second person to pump the pedal. This tool ensures no air bubbles remain, which is vital because even a tiny pocket of air can compromise your stopping power.

How can I maintain my car’s performance over the next decade?
The secret isn’t just fixing things when they break; it’s preventing the failure before the first symptom ever appears. I follow a strict regimen to maximize your cars lifespan with expert tune up strategies that go beyond the basic oil change. Every six months, I perform a 5-minute check to prevent transmission failure by inspecting the color and smell of the fluid. If it smells like burnt toast, it’s already too late. According to the Society of Automotive Engineers (SAE) Standard J2334, cyclic environmental stress and salt exposure are the primary killers of metal integrity under your car, so keeping the chassis clean is as vital as any engine work. I personally use a dedicated undercarriage sprayer to neutralize road salt every single week during the winter.
What to Expect From the Next Generation of Auto Care
Looking ahead at auto-repair trends to watch in 2025, we are seeing a massive shift toward “connected maintenance.” Soon, your car won’t just tell you there is a problem; it will use machine learning to predict the failure of a wheel bearing or a fuel pump weeks before it actually happens. This technology is already becoming available to DIYers through advanced Bluetooth dongles that analyze engine vibration patterns. Before you close the hood on your next project, I want you to try one specific advanced tip: don’t just look at your brake fluid; test it with a copper-ion strip. It’s a two-dollar test that tells you if your lines are corroding from the inside out, ensuring your understanding brake system repairs is truly professional-grade.
Lessons Learned from a Decade Under the Chassis
#IMAGE_PLACEHOLDER_E#
After years of wrenching, I’ve realized that the most expensive tool isn’t always the best, but the right information is priceless. Here are a few things I wish someone had told me before I started my first major project:
- Precision over force: If a bolt isn’t moving, don’t just grab a bigger hammer. Heat and chemical penetrants are your best friends to avoid snapping a stud and turning a one-hour job into a weekend-long nightmare.
- Cleanliness is performance: Simply wiping down a hub surface or cleaning out a brake bracket can be the difference between a silent ride and a frustrating shimmy. Detail-oriented work prevents comebacks.
- The test drive is mandatory: Never assume the job is done until you’ve cycled the suspension and performed a few low-speed stops to check your work. It is the final safety net for any home mechanic.
Tools and Resources That Keep My Garage Moving
I don’t just wing it; I rely on a few specific resources that have never steered me wrong. First, a vehicle-specific service manual is non-negotiable. Whether it’s a digital subscription or a greasy paperback, having torque specs at your fingertips is vital for your safety. Second, I always recommend keeping a logbook. Tracking how regular tune ups improve fuel efficiency and safety helps you stay ahead of wear and tear. Third, invest in a quality infrared thermometer; it’s the best way to find a sticking brake caliper or a clogged radiator after a long drive without having to touch hot metal.
Reclaim the Joy of a Smooth Ride
There is a unique pride that comes with fixing your own vehicle. It’s not just about saving money; it’s about the confidence of knowing exactly what’s happening under your feet every time you hit the road. Before you dive into your next major project, take a moment for some troubleshooting common auto repair issues before visiting the shop. You might find that a simple fix is all you need to get back on track. Remember to check your fluids often, including how to check your power steering fluid the right way, and don’t fear the switch to better products like the truth about synthetic oil in high mileage engines if your car is getting older. Your car is an investment in your daily freedom—treat it well, and it will take you anywhere you want to go. Have you ever encountered a repair that felt impossible until you finally figured out that one tiny trick? Let me know in the comments below!