

I was sitting in a grocery store parking lot with three bags of melting ice cream in the back seat when I heard it: that pathetic, rhythmic click-click-click of a dead battery. My dash lights flickered like a haunted house, and the radio died mid-song. I knew my battery was relatively new, so the culprit was obvious. My alternator had finally given up the ghost. After getting a jump-start and limping home, I called a local shop and nearly choked when they quoted me $650 for a replacement. That was the moment I decided to stop being a checkbook mechanic. I realized that for the price of a couple of wrenches and an afternoon of my time, I could do this myself and keep that hard-earned cash in my pocket. If you have ever felt that sinking pit in your stomach when a service advisor starts reciting a three-digit total, you are in the right place. Today, I am going to show you how to tackle this job with confidence.
Why You Should Stop Paying Shops for a Simple Swap
The truth is, on about 80% of cars on the road, the alternator is sitting right there at the top of the engine bay, practically begging to be serviced. Mechanics often charge a premium because they know people are intimidated by anything involving the electrical system. Before you dive in, I always recommend troubleshooting common auto repair issues before visiting the shop to confirm it is actually the alternator and not just a loose connection. I remember my first DIY attempt; I was so nervous about ‘frying the computer’ that I almost didn’t do it. But once I got started, I realized it is mostly just a game of loosening a few bolts. This is a foundational part of the ultimate car service guide when and why to schedule maintenance because knowing when to DIY versus when to call a professional is the secret to car ownership longevity. Have you ever been quoted a price for a repair that felt more like a mortgage payment? I’d love to hear your ‘mechanic sticker shock’ stories in the comments.
Is this job actually safe for a beginner to try at home?
It is completely natural to be skeptical. We are talking about the heart of your car’s charging system, after all. However, as long as you follow the golden rule—disconnect the negative battery terminal first—you are safer than you think. I learned this the hard way years ago. I thought I could skip that step, and a stray wrench hit the alternator casing, creating a shower of sparks that nearly gave me a heart attack. It was a classic rookie mistake that I’ll never make again. Beyond safety, there is the massive financial benefit. According to data from RepairPal, the average cost for an alternator replacement ranges between $584 and $765, with labor costs making up a huge chunk of that. By doing it yourself, you only pay for the part. To make the job even easier, I usually find that learning how to replace your own serpentine belt in under 20 minutes is the best prerequisite, since you’ll have to remove that belt anyway to get the alternator out. If you can handle a belt, you can handle the alternator. Sometimes, you might even realize you don’t have a part failure at all, which is why it is vital to know how to tell if your electrical problem is a blown fuse or a bad ground wire before you spend a dime on new hardware. Let’s get into the tools you’ll need to finally win one over the repair shops.
Clear the Path Before You Start Turning Wrenches
First, we need to talk about the belt. Think of your serpentine belt like a treadmill for your engine’s accessories; it transfers power from the crank to the alternator. To get the old alternator out, you have to slacken that tension. I remember my second project—a 2005 sedan—where I didn’t realize the tensioner was spring-loaded. I tried to pry it with a screwdriver and nearly launched a pulley across the garage. Use a long-handled wrench or a dedicated serpentine belt tool to rotate the tensioner. This is the perfect time to check for wear, which is why I suggest you learn how to replace your own serpentine belt in under 20 minutes. If that belt snaps later because you ignored a crack today, you’ll be right back where you started.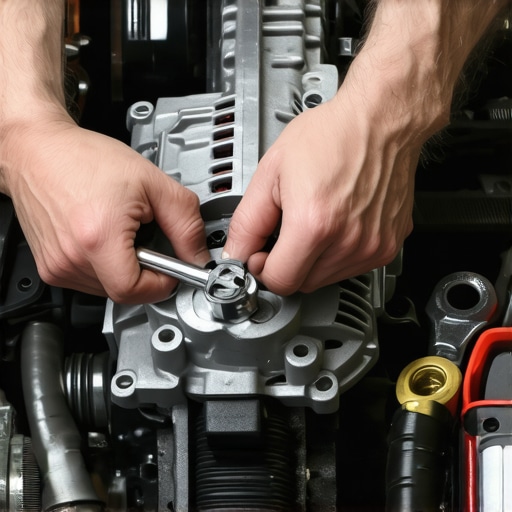
Disconnecting the Juice and Unseating the Unit
Once the belt is off, you’ll see the main power wire and a plastic plug on the back of the alternator. This is where people get sloppy. These connectors are often brittle from years of engine heat. Press the tabs gently. If the power cable—usually a heavy-gauge wire held on by a 10mm or 12mm nut—looks corroded, clean it with a wire brush. A bad connection here is one of the biggest troubleshooting common auto repair issues before visiting the shop that people overlook. While you are in there, keep an eye out for other issues; for instance, knowing how to tell if your electrical problem is a blown fuse or a bad ground wire can save you from replacing a perfectly good alternator.
Wrestle the Alternator Out of the Engine Bay
Now comes the actual muscle work. Most alternators are held in by two or three long bolts. I once spent forty minutes fighting a bolt that felt like it was welded in place by the gods of rust. I finally hit it with some penetrating oil, waited ten minutes, and it cracked loose with a satisfying pop. If you find your car behaves strangely after the swap, like the fix for a radio that loses all presets overnight, don’t panic; it’s usually just a side effect of the battery being disconnected. This kind of deep-dive maintenance is a core part of the ultimate car service guide when and why to schedule maintenance.
Seat the New Alternator and Check Your Work
Slide the new unit into the brackets. If it’s a tight fit, a small tap with a rubber mallet can help—just don’t go full Thor on it. Thread the bolts in by hand first to avoid cross-threading. Once tightened, put the belt back on, ensuring it’s seated in every groove of every pulley. If it’s even one tooth off, you’ll hear a scream that sounds like a banshee. Following a car service checklist how to keep your vehicle in top shape ensures you don’t miss these small details. Finally, reconnect the battery and start the engine. If you see around 14 volts on your dash or multimeter, you’ve just saved yourself hundreds of dollars. Regular maximize your cars lifespan with expert tune up strategies like this build the confidence needed for even bigger jobs, like understanding brake system repairs a guide for vehicle owners.Once you have successfully conquered the alternator, you might feel like you can handle anything. And you can—if you avoid the subtle traps that even seasoned weekend warriors fall into. There is a massive difference between simply fixing what is broken and performing a proper service that actually protects your car. The common wisdom is that modern vehicles are maintenance-free for the first 100,000 miles, but that is a lie designed to sell new cars, not a strategy for keeping old ones running forever. Many people ignore the truth about 10000 mile oil change intervals and assume modern synthetic oil is invincible. In reality, city driving and short trips degrade oil much faster than the marketing brochures suggest. To truly maximize your cars lifespan with expert tune up strategies, you need to look past the dashboard reminders and understand the fluids that keep your machine alive.
The Lifetime Fluid Myth is Destroying Your Transmission
The most dangerous phrase in modern automotive care is ‘lifetime fluid.’ Manufacturers often claim that transmission or differential fluids never need to be changed. However, experts at ZF Friedrichshafen, the primary manufacturer of many high-performance transmissions, recommend fluid changes every 50,000 to 75,000 miles for optimal longevity. When you believe the myth, you aren’t saving money; you are just delaying an expensive mechanical failure. I have seen dozens of DIYers fall for the most common brake service myths, specifically the idea that ‘lifetime’ ceramic pads mean you never have to check your rotors again. This neglect is how a $50 pad swap turns into a $600 full brake system overhaul. Have you ever fallen into this trap? Let me know in the comments.
Why do your brand-new brakes still feel like they are failing?
If you have just finished a brake job and the pedal feels like a wet sponge, it is usually the fix for a soft brake pedal that mechanics keep missing—air trapped deep inside the ABS module or a failure to properly seat the new hardware. Most beginners think brake pads are ‘plug and play,’ but if you do not follow the proper way to break in new brake pads and rotors, you will likely experience ‘glazing.’ This happens when the resin in the pads melts onto the rotor, creating a slick surface that actually reduces your stopping power. It is a nuanced step that the manuals often skip, but it is the difference between a professional-grade repair and a dangerous DIY mistake.
Avoid the Petrol-Grease Trap on Your Caliper Pins
The biggest ‘oops’ factor I see in garage-based brake service involves lubrication. Most people grab whatever grease they have on the shelf to lubricate their caliper slide pins. If you use a petroleum-based grease on those pins, the rubber boots will swell and tear within months. This allows water to enter, causing the pins to seize and your brakes to wear unevenly. You must use a dedicated high-temperature silicone or ceramic lubricant specifically designed for brake hardware. It is a tiny detail that determines whether your repair lasts five years or five months. This level of precision is what separates a true mechanic from someone who just knows how to turn a wrench. By paying attention to these hidden nuances, you ensure that your DIY efforts actually keep your family safe and your bank account full.Once you have the hardware figured out, you realize that the difference between a weekend tinkerer and a seasoned pro often comes down to the data you are looking at. I used to guess why my car was idling rough until I bought a dedicated bidirectional scan tool. While most people settle for a cheap code reader from the local parts store, I personally swear by the Autel MaxiCOM series. It doesn’t just read codes; it lets you perform active tests—like firing fuel injectors or cycling the ABS pump—which is the only way to perform a truly professional level of troubleshooting common auto repair issues before visiting the shop.
Invest in a Real Torque Wrench Before You Strip a Bolt
I cannot tell you how many times I have seen someone ‘snug’ a valve cover bolt only to hear that sickening snap. To truly maximize your cars lifespan with expert tune up strategies, you need to respect factory torque specs. I use a split-beam torque wrench because, unlike the click-type ones, you do not have to dial it back to zero every time you put it away. It stays calibrated longer and gives a much more tactile feedback when you reach that sweet spot. Following a detailed car service checklist how to keep your vehicle in top shape means nothing if the bolts holding your engine together are stretched or loose.
How do I keep my car running like new for decades?
Maintenance over the long haul is about consistency and high-quality fluids. I follow the ultimate car service guide when and why to schedule maintenance religiously, but I also add my own layer of protection: Blackstone Laboratories oil analysis. By sending a small sample of my used oil to a lab, I get a report on the wear metals in my engine. It is like a blood test for your car. This data tells me if my bearings are wearing or if I have a hidden coolant leak long before a dashboard light ever flickers. This is the secret to scaling your maintenance from ‘fixing things that break’ to ‘preventing failure entirely.’
The Digital Shift in Your Driveway
Looking ahead, the DIY world is changing. We are moving toward a future where software updates will be as common as oil changes. In fact, many auto repair trends to watch in 2025 point toward increased reliance on ADAS (Advanced Driver Assistance Systems). You might be able to change your own oil, but you will soon need to know how to tell if your local mechanic actually has the tools for a proper adas calibration after something as simple as a windshield replacement or a suspension lift. The vehicles are becoming rolling computers, and our toolboxes need to reflect that. I highly recommend picking up a high-quality multimeter and learning how to read a wiring schematic today—it is the best ‘future-proofing’ you can do for your garage skills.
The One Mistake That Taught Me Everything About DIY Maintenance
The biggest hurdle in garage-based repair isn’t a rusty bolt; it’s the temptation to take shortcuts once you feel confident. I once replaced a water pump but didn’t bother to check the surrounding hoses because I was ‘done’ with the job. Two days later, a split hose left me stranded. Now, I live by a simple rule: always perform one extra inspection before closing the hood. Learning how regular tune ups improve fuel efficiency and safety taught me that maintenance isn’t just about fixing what’s broken; it’s about observing the machine as a whole. Don’t let your success on a single part blind you to the health of the entire system.
The Gear That Separates Beginners from Experts
If you want to transition from a ‘parts swapper’ to a diagnostic pro, you need more than a basic socket set. I always recommend keeping these three things in your cabinet: First, a high-quality multimeter—electrical issues are the primary reason cars end up at the dealership, so don’t guess, measure. Second, the ‘Cigar’ Trick; you don’t need a $500 smoke machine to find air leaks when knowing how to identify a vacuum leak using a simple cigar is a classic pro move that saves hundreds in diagnostic fees. Finally, a comprehensive roadmap; I keep tune up your car for peak performance essential maintenance tips bookmarked because it provides the structure needed for every mileage interval.
#IMAGE_PLACEHOLDER_E#
Stop Waiting for the Check Engine Light
The true joy of auto repair isn’t just the money you save—though that $600 you kept during the alternator swap feels pretty good. The real win is the peace of mind that comes from knowing exactly what is happening under your floorboards. You aren’t just a passenger anymore; you are the guardian of your vehicle. If you stay diligent and follow the secret to getting 200000 miles out of your original engine, you’ll realize that cars don’t just ‘die’—they are neglected into early retirement. So, grab your gloves and get started on that next project today. Have you ever had a DIY repair go sideways because of a ‘simple’ five-dollar part? Let me know your stories in the comments below.