

I remember the first time it happened to me. I was pulling out of my driveway, coffee in hand, and suddenly—*click, click, click*. It wasn’t the engine. It wasn’t the tires. It was coming from right behind the vents. I felt that immediate pit in my stomach. Is my car about to die? Is this a thousand-dollar repair? I’ll be honest, I ignored it. I cranked the radio. But ignoring a noise like that is exactly how I ended up stranded three months later when my defroster failed in a literal blizzard. I made the mistake of thinking it was a major mechanical failure, when in reality, it was a tiny plastic gear that had finally given up the ghost. Today, I’m going to show you how to identify this hidden culprit so you don’t waste money at the shop like I did. We’re going to dive into the world of blend door actuators—the tiny, overworked motors that control your climate. If you’ve been troubleshooting common auto repair issues before visiting the shop, you know that sound is your car’s way of crying for help.
That Rhythmic Tapping Is Likely a Failing Blend Door Actuator
The sound usually starts small. A faint tap when you turn on the AC or switch the heat to your feet. These actuators are the unsung heroes of your dashboard, responsible for moving the plastic flaps that direct airflow. When the plastic teeth on those internal gears strip out, the motor keeps spinning, trying to find its home, resulting in that maddening clicking sound. Early in my DIY days, I once replaced an entire blower motor thinking the fan was hitting a leaf. I wasted an entire Saturday and $150 only to hear that same click the second I turned the key. It was a humbling lesson in properly identifying the source. If you’ve been looking for tune up for peak performance tips, remember that internal comfort systems are just as vital as what’s under the hood.
Will this clicking sound eventually ruin my entire HVAC system?
It’s a fair question to be worried about. While the clicking itself won’t make your engine explode, it is a ticking clock for your comfort. Eventually, that actuator will die completely, leaving you stuck with only hot air in the summer or a frozen windshield in the winter. According to industry data from the Car Care Council, neglected minor repairs are one of the leading causes of preventable roadside assistance calls. Don’t be the person who waits until they can’t see through a fogged-up window to take action. Have you ever tried to ‘fix’ a dash noise by just hitting the glovebox? I’ve been there, and I can tell you it never works for long. Before you dive into the ultimate car service guide, let’s look at exactly how to pinpoint which actuator is the one lying to you.
Listen Closer to Find the Faulty Gear
To find the culprit, you need to become a bit of a detective. Most cars have several actuators: one for the temperature (the blend door), one for the mode (defrost vs. floor), and one for recirculation. To isolate the failing unit, start your engine and cycle through your settings one by one. If the clicking starts only when you crank the heat, it’s your temperature actuator. If it happens when you switch from the vents to the floor, it’s the mode door. Much like when you how to use your ears to find a suspension clunk, identifying the specific ‘when’ tells you exactly where to look. I remember a humid July morning in my old ’08 sedan where I was convinced the whole AC compressor had seized. I spent an hour sweating in the driveway before I realized the clicking only happened when I hit the ‘Recirculate’ button. It wasn’t a major mechanical failure; it was just a $25 plastic motor behind the glovebox that had lost its rhythm.
Clear Your Glovebox to Reach the Components
In about 80% of modern vehicles, the primary actuators are located right behind your glovebox or tucked up near the gas pedal. Empty out your glovebox—seriously, take everything out—and look for the tabs on the sides. You can usually squeeze these inward to let the glovebox drop down past its stops. This exposes the ‘skeleton’ of your HVAC system. If you’ve been following a car service checklist, this is a great time to also check your cabin air filter, as they are usually located in the same neighborhood. 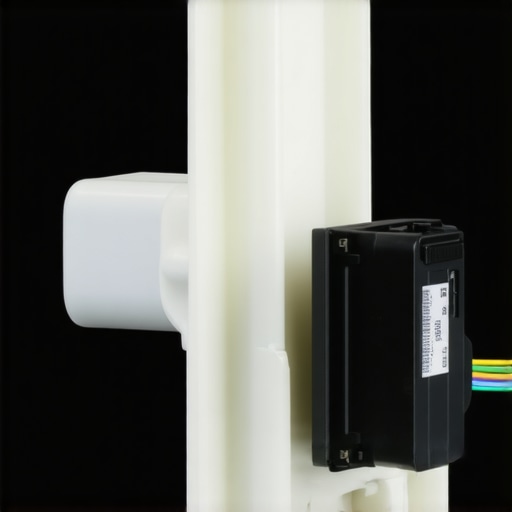
Swap the Gear Without Breaking Your Back
Once you’ve spotted the small black box (the actuator) that is vibrating or clicking, you’ll likely need a 7mm or 8mm socket. Space will be tight. Think of it like a game of Operation—you have to be precise. One time, I got impatient and tried to force a screw at an angle, stripping the plastic housing on the heater box. That turned a twenty-minute job into a four-hour nightmare involving epoxy and a lot of swearing. Use a small 1/4-inch drive ratchet to keep things manageable. Before you pull the old one out, take a photo of the position of the white plastic arm it connects to. This arm is the ‘railroad switch’ that directs your air. If the new actuator isn’t aligned perfectly with that arm, it won’t seat properly, and you’ll be right back where you started. If you have the confidence to how to replace your own alternator and save hundreds, this small-scale surgery is well within your wheelhouse.
The Final Calibration Trick
Once the new part is bolted in and plugged back in, don’t just slam the dash back together. Most vehicles require a ‘recalibration’ so the computer knows where the new limits are. Usually, this is as simple as turning the key to the ‘On’ position (without starting the engine) and letting the climate control run through its cycles for about 60 seconds. You’ll hear the new motor whirring as it finds its home. If you skip this, the motor might try to push the door too far, stripping those brand-new plastic gears immediately. Just like when you’re troubleshooting common auto repair issues before visiting the shop, patience during the testing phase is what separates a successful DIY fix from a repeat repair.Identifying that clicking actuator saved you money, but it also highlights a broader issue in DIY auto repair: the obsession with the ‘noisy’ part while ignoring the ‘silent’ failure. Take brakes, for example. Most people think a brake job is just swapping pads when they hear a squeal. I’ve seen countless neighbors spend hundreds on ‘premium’ ceramic pads only to complain that their car still pulls to the left or feels ‘mushy.’ The truth is, your pads are rarely the whole story. While everyone talks about friction material, the real experts focus on the hydraulic integrity and the mechanical slides. If you’ve been reading up on brake service myths, you know that the most common mistake is ignoring the caliper slide pins. If those pins are dry or seized, your brand-new pads will wear unevenly in weeks. In my shop days, I saw a ‘fresh’ brake job ruined because the owner used chassis grease instead of high-temp silicone lubricant on the pins. The chassis grease swelled the rubber boots, locked the brakes, and turned the rotors blue from heat.
Why does my brake pedal still feel like a wet sponge after a full service?
This is the question that drives most DIYers crazy. You’ve changed the pads, you’ve swapped the rotors, and yet the pedal still sinks. Most ‘expert’ advice tells you to just bleed the lines again. But here is the nuance: you might be dealing with an internal bypass in the master cylinder or a collapsed inner liner of a brake hose. A study by the National Highway Traffic Safety Administration (NHTSA) indicates that brake-related issues are a factor in roughly 22% of crashes where vehicle failure was the cause, often due to neglected hydraulic maintenance rather than just thin pads. If you’re trying to tell if your master cylinder is failing internally, you won’t see a leak. The fluid is simply moving past the internal seals. It’s these invisible failures that separate a basic ‘part-swapper’ from someone who understands expert tune-up strategies.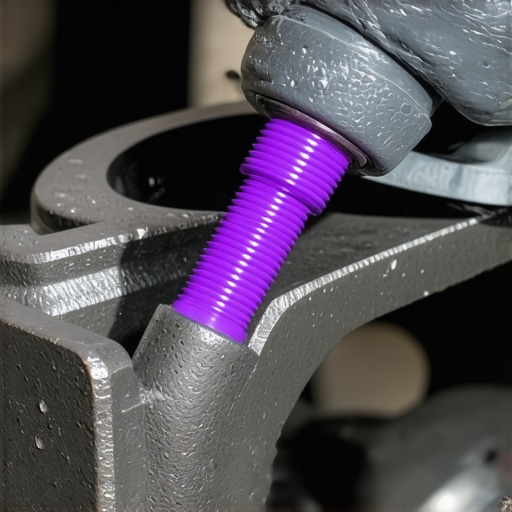 One major ‘trap’ to avoid is the belief that ‘more is better’—especially with lubricants or additives. I once had a client who put ‘stop-leak’ in every reservoir he could find, thinking he was being proactive. Instead, he clogged the small orifices in his ABS block. This ‘preventative’ move cost him $2,000. Real maintenance is about precision, not saturation. When you’re following a car service checklist, remember that cleaning a surface is often more important than adding a new chemical. For those looking for a tune up for peak performance, don’t forget the ‘break-in’ period. Even the best parts fail if not treated right. I always recommend taking the time to learn the simple way to bed in new brake pads. This transfer of a thin layer of friction material to the rotor is what prevents that annoying ‘warped rotor’ vibration later on. Modern cars are more sensitive than the rust-buckets I grew up on. A small vacuum leak or a slightly fouled sensor can throw off the whole system. If you want to see how regular tune-ups improve fuel efficiency, you have to look past the spark plugs and into the data. Have you ever fallen into the trap of replacing a part only to find the problem was something much smaller and ‘invisible’? Let me know in the comments below—I’d love to hear your ‘war stories’ from the garage.
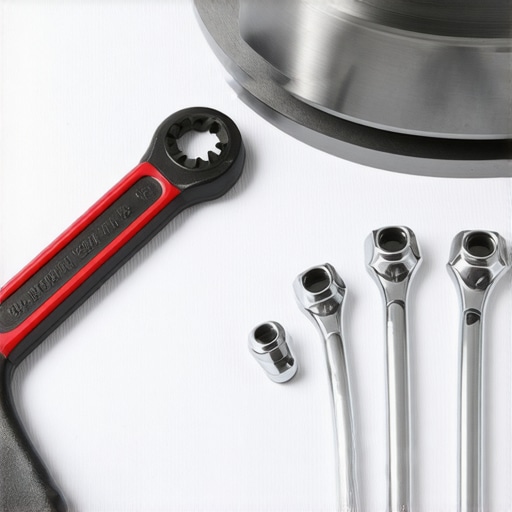
I’ve spent years collecting tools, and if there’s one thing I’ve learned, it’s that the wrong tool turns a 30-minute job into a weekend-long ordeal. When you’re tackling something as critical as your brakes, you can’t afford to round off a bleeder screw. That’s why I always reach for a flare nut wrench instead of a standard open-end wrench. It grips all six sides of the fitting, which is crucial when you’re dealing with brake lines that have seen a few winters. This kind of precision is exactly what I mean when I talk about expert tune-up strategies. It’s not just about doing the work; it’s about having the right gear to ensure you don’t create new problems while fixing old ones.
Stop Guessing and Start Torquing
If you’re serious about your car service, you need to stop using the ‘hand-tight’ method for everything. I used to be proud of my ‘calibrated elbow,’ but after I snapped a caliper bolt on a Sunday afternoon when every parts store was closed, I became a torque wrench evangelist. For brake components, the difference between ‘tight enough’ and the factory specification is the difference between a silent ride and a dangerous vibration. Learn the proper way to torque wheel bolts without a manual to ensure your rotors stay true. Using a quality 1/2-inch drive torque wrench for your lugs and a 3/8-inch for your caliper bolts is a non-negotiable part of my workflow now.
How can I keep my braking system crisp for years?
The answer is simpler than most people think: stop ignoring your fluid. Most manufacturers, including the Society of Automotive Engineers (SAE) in their technical standards for hydraulic systems (J1703), emphasize that brake fluid is hygroscopic. It literally sucks moisture out of the air. Over time, that water lowers the boiling point of the fluid and corrodes the internals of your calipers and master cylinder. If you’ve noticed why your brake fluid looks like coffee creamer, you’re already in the danger zone. I make it a habit to flush my lines every two years, regardless of mileage. It’s the cheapest insurance policy you can buy for your car’s safety, and it ensures you aren’t surprised by a collapsed brake hose caused by internal rot.
The Digital Shift in Your Driveway
As we look toward the future, the DIY landscape is shifting rapidly. With the rise of electric vehicles and brake-by-wire systems, the mechanical links we’re used to are being replaced by sensors and actuators—much like those blend doors we talked about earlier. Staying on top of auto repair trends to watch in 2025 will mean getting comfortable with diagnostic software. Soon, your laptop will be as important as your socket set for tasks like retracting electronic parking brakes or clearing ABS codes. Don’t be intimidated by the tech; even now, learning how to tell if your computer is giving you a false error code can save you from a ‘parts cannon’ approach to repairs. I challenge you to try this: Next time you’re doing a routine check, pull one wheel and inspect the slide pins. If they aren’t sliding like butter, clean them and use a high-quality silicone lube. You’ll be amazed at how much better your pedal feels once those components can actually move freely.
Hard Truths from a Decade Under the Chassis
If there is one thing that years of grease under my fingernails has taught me, it is that the loudest noise isn’t always the biggest problem. I’ve seen people sell cars because of a dashboard click that turned out to be a $20 fix. The mental hurdle of troubleshooting common auto repair issues before visiting the shop is usually higher than the actual mechanical hurdle. When I first started, I thought every odd sound meant the engine was toast. Now I know that a rhythmic tap is often just a plastic gear, and a soft pedal is frequently just thirsty for a fluid flush. Don’t let the complexity of a modern engine bay intimidate you; most of it is still just nuts and bolts waiting for the right tool and a bit of patience.
The Gear That Saved My Sanity
You do not need a professional shop setup to get professional results, but you do need to stop using adjustable wrenches for every task. My ‘survival kit’ for any car service starts with a high-quality 1/4-inch drive ratchet for those tight dashboard spots and a dedicated flare nut wrench for brake lines. I also highly recommend keeping a copy of the SAE J1703 standards bookmarked in your mind—it explains exactly why your fluid fails over time. If you want to maximize your car’s lifespan with expert tune-up strategies, investing in a digital multimeter and a basic OBD-II scanner will pay for itself the first time you avoid an unnecessary sensor replacement. These tools turn guessing into knowing.
Take Control of Your Driveway
Working on your own vehicle is about more than just saving a few bucks on brake service; it is about the confidence that comes with knowing exactly how your machine works. Whether you are hunting down a vacuum leak or recalibrating a blend door actuator, you are taking back ownership of your transportation. The next time you hear a strange noise or feel a vibration, do not just turn up the radio to drown it out. Pop the hood, trust your ears, and remember that every expert was once a beginner with a clicking dashboard. Auto repair is a skill that rewards curiosity as much as it does hard work. Have you ever found a tiny $5 part that fixed a seemingly catastrophic noise? Let me know your biggest ‘cheap fix’ win in the comments below!