
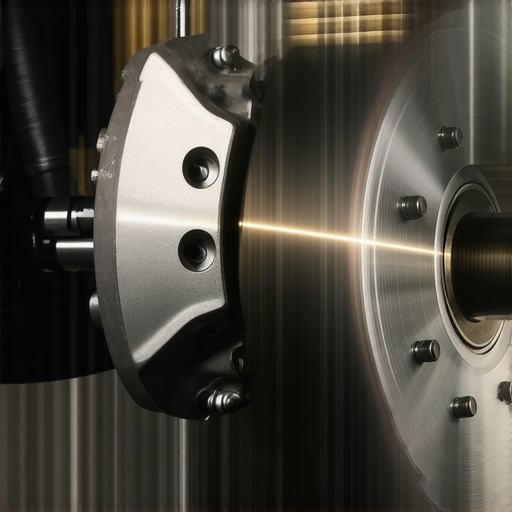
I still remember the first time it happened to me. I was driving my old sedan down a steep mountain pass, feeling pretty good about my DIY maintenance skills, when I had to slow down for a sharp curve. The moment my foot touched the pedal, the whole car started bucking like a frightened horse. It wasn’t just a little vibration; it felt like the steering wheel was trying to jump right out of my hands. I gripped the wheel tighter, my knuckles turning white, wondering if a wheel was about to fly off or if my front end was simply disintegrating. It is a visceral, heart-stopping sensation that instantly kills your confidence in your car. If you are feeling that same rhythmic throb or a frantic shudder every time you try to slow down, I want you to know you aren’t alone, and your car isn’t necessarily a goner. We are going to get to the bottom of this today.
That Steering Wheel Shake is Screaming for Help
The pulsing you feel isn’t just an annoying quirk of an older vehicle; it is a physical SOS from your braking system. Most people immediately panic and assume they need a multi-thousand-dollar overhaul, but the truth is usually much more manageable. When your car pulses, it is often because the brake pads are struggling to grab a surface that isn’t perfectly flat. Think of it like a record player with a warped vinyl; every time the needle hits the ‘bump,’ you get a skip. In your vehicle, that skip travels through the suspension and right into your palms. Before you spend a dime at a shop, it helps to spend some time troubleshooting common auto repair issues before visiting the shop. Understanding whether the vibration is coming from the front or the rear can save you a lot of headache and money.
Is a pulsing pedal really a safety emergency?
You might be tempted to just ‘drive through it’ for a few months, especially if the pulsing is faint. I’ll be honest with you—I made that exact mistake early on. I ignored a minor shimmy for a whole summer because I was ‘too busy’ to pull the wheels off. By the time I finally checked, I had unevenly worn my tires and stressed my tie rods so badly that a simple rotor swap turned into a major front-end rebuild. According to the National Highway Traffic Safety Administration (NHTSA), brake failure or degradation is a factor in roughly 22% of crashes caused by vehicle issues. It’s not just about comfort; it is about your stopping distance and your car’s ability to stay stable in an emergency. Avoiding brake service myths is the first step toward keeping your family safe on the road.
Stop Ignoring That Rhythm in Your Brake Pedal
Early in my journey as a car enthusiast, I thought I could fix everything with a new set of pads. I didn’t realize that understanding brake system repairs meant looking at the whole picture, not just the parts that wear down. I once actually caused my own brake pulse by failing to learn the proper way to torque wheel bolts without a manual. By tightening the lug nuts unevenly, I warped the rotor flange over time, creating the very problem I was trying to avoid. Have you ever felt that terrifying shudder while trying to make a smooth stop at a red light? Tell me about it in the comments. Let’s look at why this happens and how to fix it for good.
Pinpoint the Vibration Before Tearing the Car Apart
If your steering wheel is dancing in your hands, the problem is almost certainly in the front. If you feel the vibration in your seat or the brake pedal specifically without the wheel moving, focus on the rear. One of my favorite tricks for troubleshooting common auto repair issues before visiting the shop is to pay attention to the speed. A warped rotor pulse usually gets worse as you slow down from 50 to 20 mph. If the shake is constant regardless of whether you are braking, you might actually be looking at a tire balance issue or a failing suspension component rather than a brake problem.
Get Rid of the Rust on the Hub Surface
This is the step that most DIYers—and even some lazy pros—skip, and it is why the pulse often comes back. I learned this the hard way on my old truck. I put on brand-new, premium rotors, but I did not scrape the rust off the wheel hub. That tiny bit of corrosion, even just a fraction of a millimeter thick, caused the rotor to sit slightly crooked. In less than a thousand miles, the ‘runout’ caused the brake pads to wear the rotor unevenly, and the vibration was back with a vengeance. You need a wire brush or a drill attachment to get that hub surface as shiny as a new coin. 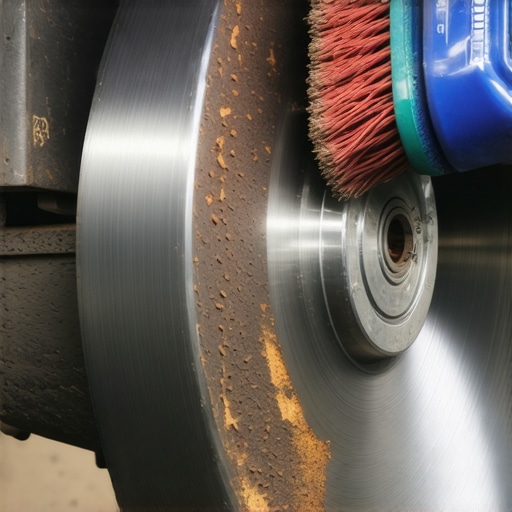 If you do not, your new parts are doomed from the start. While you have the wheel off, it is also the perfect time to spot a collapsed brake hose in seconds by looking for cracks or strange bulges that could be causing uneven pressure.
Ditch the Impact Wrench for the Final Turn
I have seen more rotors ruined by ‘ugga-duggas’ from an air wrench than by actual driving. Uneven pressure on the lug nuts pulls the rotor unevenly against the hub, leading to heat-induced warping. You must use a torque wrench in a star pattern to ensure the wheel is seated perfectly flat. Following the proper way to torque wheel bolts without a manual ensures that the clamping force is distributed equally. It is a five-minute step that prevents a three-hour redo.
Why You Must Bed Your New Pads
Once everything is bolted back together, do not just drive off into traffic. You need to transfer a thin layer of friction material from the pads to the rotors. This process is called bedding. If you do not do this, the pads will grab the bare metal unevenly, creating ‘hot spots’ that feel exactly like a warped rotor. I usually perform five or six aggressive slows—not full stops—from 45 mph down to 10 mph in a safe, empty parking lot. Learning the simple way to bed in new brake pads is the final insurance policy for a smooth ride.
Check Your Calipers for Heat Damage
A pulsing brake is not always about the rotor being bent; sometimes it is about the caliper sticking. If one side of your braking system is staying partially engaged, it creates massive heat that cooks the rotor. This is part of the broader scope of understanding brake system repairs. If you notice one wheel is significantly hotter than the others after a drive, or if your car smells like something is burning after a short drive, your caliper slide pins are likely seized. Clean them and use high-temp silicone grease to keep things moving. This keeps your system healthy between major intervals, much like how you tune up your car for peak performance by looking at the small details that prevent big failures.Let’s dig deeper into the science of why your car is shaking, because what most people call a ‘warped rotor’ is actually a chemical phenomenon. In my experience, 90% of the rotors I see aren’t physically bent; instead, they are victims of uneven friction material transfer. When you sit at a long stoplight with scorching brakes, the pads ‘stamp’ a layer of material onto the rotor. This creates a patch of high-friction Cementite. According to the friction experts at SAE International, these hard spots are more wear-resistant than the cast iron around them, meaning they don’t wear down; they just get more prominent over time. If you follow common brake service myths and just ‘turn’ the rotors, you often leave these deep heat-affected zones behind, only for the vibration to return in weeks. The real ‘oops’ factor is failing to clean the mounting surfaces; even a single speck of rust can cause ‘lateral runout,’ which creates the very vibration you’re trying to fix. 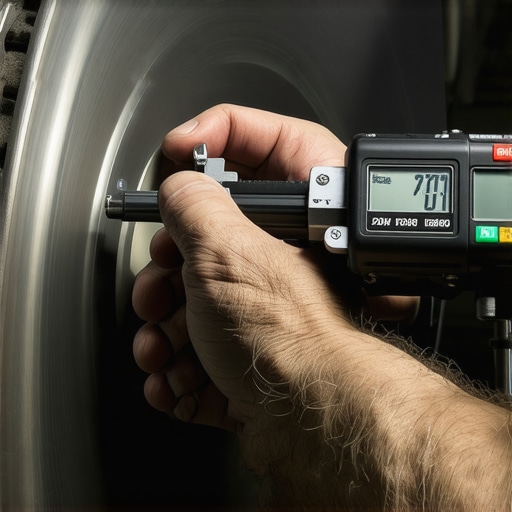
The Warped Rotor Myth That Costs You Money
Most drivers think that expensive rotors are the only answer, but in reality, understanding brake system repairs means knowing how to manage heat. I’ve seen brand-new high-end kits fail because the driver didn’t properly bed them in, leading to uneven deposits that feel like a mechanical failure.
Can a failing master cylinder mimic a rotor pulse?
It sounds counterintuitive, but an internal seal failure can cause erratic hydraulic pressure that feels like a mechanical shudder. Before you spend a fortune on performance parts, check how to tell if your master cylinder is failing internally. It’s this kind of diagnostic nuance that separates a basic repair from a true tune up for peak performance. The trap many DIYers fall into is using the wrong type of lubricant on the guide pins. Standard axle grease will swell the rubber boots, causing the caliper to seize and the rotor to overheat. You must use a dedicated high-temperature ceramic or silicone brake lubricant to ensure the caliper slides freely. Another hidden culprit is the state of your hydraulic fluid. If your brake fluid looks like coffee creamer, you have a major moisture problem. This water boils into steam under heavy braking, leading to a spongy pedal that people often mistake for mechanical wear. A study by the Car Care Council suggests that nearly 80% of vehicles on the road have at least one neglected maintenance item, and brake fluid is almost always on that list. Have you ever fallen into the trap of replacing your rotors three times in a year only to have the shake return? Let me know in the comments. By following the ultimate car service guide, you can stop treating the symptoms and finally fix the underlying cause.I can’t stress this enough: stop guessing. If you want to know why that vibration keeps coming back, you need to measure the lateral runout. I personally use a simple dial indicator with a magnetic base—it costs about $30, but it’s the difference between a ‘good enough’ job and a professional one. According to the Bendix Technical Bulletin on Brake Pulsation, even 0.002 inches of runout can lead to significant DTV (Disc Thickness Variation) over time. If you don’t catch that tiny wobble during installation, you’re just waiting for the pulse to return. This level of precision is exactly what I talk about when I say you should maximize your cars lifespan with expert tune-up strategies. It isn’t just about changing parts; it is about verifying they are installed perfectly. I’ve spent countless hours in my driveway chasing ‘ghost’ vibrations that only went away once I started using real measuring tools instead of just eyeballing it. Most people think they can skip the cleaning, but a single fleck of debris behind the rotor will ruin a $200 set of parts in weeks. 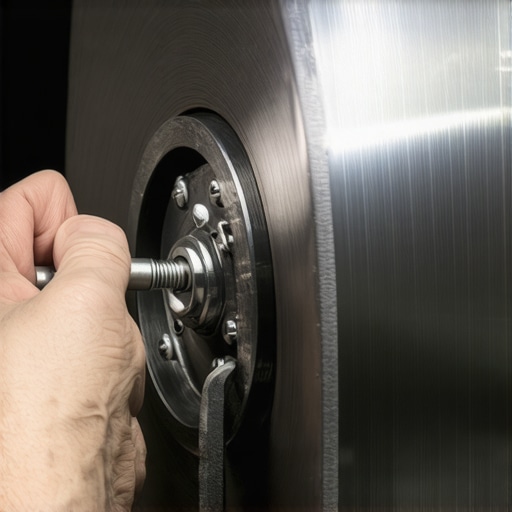
How do I keep my brakes smooth for the long haul?
The secret isn’t a magic spray; it is a car service checklist that includes more than just an oil change. Every time I rotate my tires, I do a quick visual check of the pads and, more importantly, I spray out the brake dust from the caliper assembly. Accumulated dust holds moisture and heat, which are the twin enemies of a smooth stop. You should also think about how regular tune-ups improve fuel efficiency and safety; a dragging brake doesn’t just vibrate, it kills your MPG. If you notice even the slightest hint of a shimmy, don’t wait. Re-bed the pads immediately to clear off any uneven deposits before they turn into permanent Cementite spots. I also keep a small tub of purple ceramic brake lubricant in my toolbox; it is the only thing I trust to stay slippery under the intense heat of a mountain descent. I’ll tell you another secret: stop buying the ‘economy’ pads. I used to think I was being frugal, but those cheap pads have high resin content that outgasses under heat, contributing directly to the uneven pad transfer. Investing in high-carbon rotors and quality pads is part of understanding brake system repairs at a deeper level.
What the Future Holds for Stopping Power
Looking ahead, the way we maintain our cars is shifting. As we see more auto repair trends to watch in 2025, ‘brake-by-wire’ systems are becoming standard. These systems use sensors and actuators instead of a direct physical link, which might actually hide the ‘feel’ of a warped rotor until the system throws a code. It makes our job harder because we lose that tactile feedback I’ve been talking about. We are moving toward a world where software diagnostics will be just as important as a heavy-duty jack. My advice? Go grab a torque wrench and a dial indicator today. Measure your rotor runout on your next brake job and see just how far off your hub really is. It’s a game-changer for your driving confidence and will save you hundreds in the long run.
The Hardest Lessons I Learned Between the Hub and the Rotor
After years of wrenching, I’ve realized that a smooth stop isn’t about how much you spend on parts, but how much effort you put into the preparation. One of my biggest lightbulb moments was discovering that a spongy feel isn’t always about the metal; sometimes you need to find the fix for a soft brake pedal that mechanics keep missing before you blame the rotors. I also learned that if the pedal is slowly sinking toward the floor, it is vital to know how to tell if your brake booster is losing pressure. Cleanliness is non-negotiable—a single grain of sand between the hub and the rotor can cause a thousand miles of frustration. Lastly, I realized that if you can’t afford new rotors right now, you should look into the only way to fix grinding bakes without replacing rotors to get you by safely.
My Trusty Tools for a Vibration-Free Ride
For my personal projects, I never touch a wheel without my 1/2-inch drive torque wrench and a tub of high-temp ceramic grease. These aren’t just ‘nice-to-haves’; they are the foundation of my personal car service checklist. I also swear by using a dial indicator to check for runout—it’s the only way to be 100% sure the job is done right. This level of precision is exactly how you maximize your cars lifespan with expert tune-up strategies and ensure you aren’t re-doing the same job in six months. I also recommend keeping a dedicated wire brush drill attachment in your kit to keep those hubs gleaming.
Take Back Your Peace of Mind on Every Sharp Curve
You don’t have to accept a steering wheel that fights you every time you slow down. By slowing down, using the right tools, and focusing on the precision of the installation, you can restore that factory-fresh feel to your vehicle. Following the ultimate car service guide ensures you aren’t just throwing parts at a problem, but performing a professional-grade brake service that will last. Don’t be afraid to get your hands dirty; the reward of a silent, smooth stop is worth every second of effort. Have you ever replaced your rotors only to have the shaking come back just a few weeks later? Let me know your story in the comments below.