
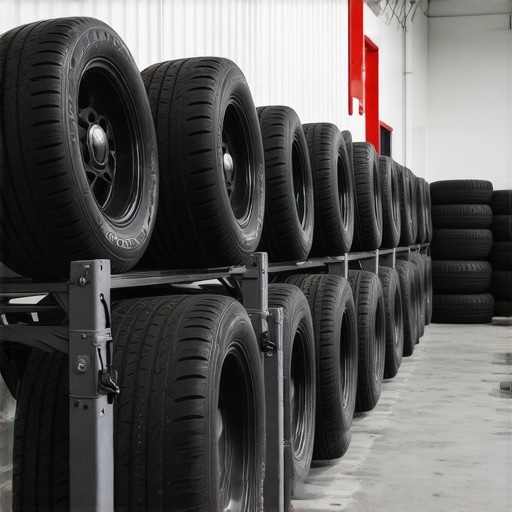
I still remember the sinking feeling in my gut when I rolled my winter tires out of the shed last November. I’d spent nearly a thousand bucks on those grippy beauties, only to find them covered in fine, spider-web cracks. I thought I was being smart by just “keeping them out of the way,” but I’d basically left them to bake in a makeshift oven. It was a classic rookie mistake, much like the time I realized why my car actually failed its inspection. It turns out, rubber is a lot more sensitive than we give it credit for, and if you treat your off-season set like scrap metal, they’ll reward you by failing when you need them most.
My $800 Mistake and Why Your Tires Need a Proper Summer Vacation
The truth is, your tires are “alive” in a chemical sense. They contain oils and antioxidants that keep the rubber supple. When you leave them sitting in a hot garage or, heaven forbid, outside under a tarp, those oils evaporate. I learned the hard way that temperature fluctuations do more damage than thousands of miles of driving. It’s a lot like skipping a standard car service checklist; you don’t notice the damage until it’s too late to fix it. Today, I’m going to show you exactly how to prep, bag, and stack your tires so they stay as fresh as the day you bought them.
Are those expensive storage bags actually worth the hype?
I used to think those airtight tire bags were just a gimmick designed to separate enthusiasts from their cash. I was skeptical, thinking a heavy-duty trash bag would do the same job. But after seeing how much better my second set held up, I’m a convert. According to experts at Tire Rack, the goal is to prevent the lubricating oils within the tire from evaporating, and a truly airtight seal is the only way to do that. If you’ve ever wondered how to read the date code on your tires, you already know that tires have a shelf life—proper storage just ensures you actually get to use all those years.
Stop the Rot Before It Starts
Before you even think about where to put them, you have to get the grime off. Brake dust is incredibly corrosive; if you let it sit on your rims for six months, it’ll eat right through the finish. I always take a few extra minutes to give them a deep clean. Have you ever struggled with tires that look “old” even though they have plenty of tread left? That’s usually down to poor storage prep. It’s just as vital as knowing the hidden benefit of rotating tires every few thousand miles. You’re protecting your investment.
Have you ever pulled your tires out of storage only to find them looking worse for wear? Drop a comment and let me know if you’ve dealt with dry rot—I’d love to hear I’m not the only one who learned this lesson the hard way!
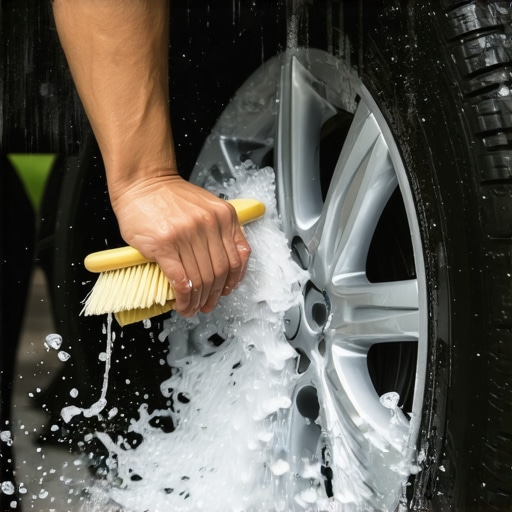
I learned the hard way that you can’t just toss tires into a corner and hope for the best. To keep the rubber from turning into a brittle, useless mess, you need a process. It starts with a deep scrub. Most people don’t realize that brake dust is actually metallic and acidic; if you let it sit on your rims for months, it doesn’t just stain—it pits the metal. I once spent an entire Saturday morning with a toothbrush and a bucket of soapy water because I’d ignored the best way to clean wheels without ruining the coating the previous year. Use a mild detergent and make sure they are bone-dry before you even think about the next step. Any moisture trapped in a storage bag is just an invitation for corrosion and rot.
Vacuum Seal Your Tires Like Leftover Steak
This is where the magic happens. The goal of bagging isn’t just to keep your garage floor clean; it’s to stop the air from circulating. Tires are constantly ‘off-gassing’ their essential oils. By placing each tire in a heavy-duty, airtight plastic bag and sucking the air out with a vacuum cleaner, you create a time capsule for the rubber. It’s a precision move that ranks right up there with knowing expert tune-up strategies for longevity. I’ve found that using a shop vac to pull the air out before taping the bag shut keeps the rubber significantly more supple. While some people swear by filling them with special gases, the truth about nitrogen in your tires is that a solid airtight seal in a standard bag does 90% of the heavy lifting for the average driver.
Stack Them or Hang Them Based on the Rim
How you physically position the tires depends entirely on whether they are still mounted on the rims. If they are on the wheels, you should actually hang them from hooks or stack them vertically. The rim provides the structural support needed to prevent flat spots. However, if you are storing just the rubber carcasses without rims, never hang them. This will distort the bead and make them a nightmare to balance later. You might even find why your car pulls hard to the right after new tires is simply because the bead was deformed during a winter in the shed. For unmounted tires, standing them upright in a row like books on a shelf is the gold standard.
Find a Climate-Controlled Sweet Spot
Temperature is the silent killer of performance rubber. I used to store mine in a garden shed that felt like a sauna in July. By September, the sidewalls looked like a dried-out lakebed. You want a cool, dry, and dark location. Basements are usually better than garages because they lack the massive temperature swings. Also, keep them away from electric motors—like your furnace or sump pump. These motors produce ozone, which is an absolute nightmare for tire compounds. Taking these precautions is just as vital as scheduling regular maintenance; it’s all about protecting the parts that keep you on the road. Think of your storage area like a cellar for fine wine; if it’s too hot for you to be comfortable, it’s definitely too hot for your Michelins. Just as you’d be diligent about understanding brake system repairs to ensure safety, proper storage ensures your tires don’t fail you at 70 mph.
While mastering tire storage saves you a few hundred bucks, applying that same ‘low-effort’ logic to the rest of your vehicle can be a catastrophic mistake. In my years of turning wrenches, I’ve seen more damage caused by following ‘official’ marketing schedules than by skipping a single oil change. We need to look past the surface level if we really want to maximize your cars lifespan with expert tune-up strategies. It is about understanding the chemical and mechanical realities of your machine, rather than just checking boxes on a generic form.
The Dangerous Myth of Lifetime Fluids
The biggest lie in modern automotive maintenance is the concept of ‘lifetime’ fluid. Whether it is your transmission, differential, or cooling system, manufacturers often claim these fluids never need replacing. It sounds great on a sales brochure because it lowers the perceived cost of ownership, but it is a mechanical death sentence. In reality, no fluid is immune to heat cycles, oxidation, and shear. By the time you realize your transmission is slipping or your gears are whining, the internal damage is often irreversible. I always recommend ignoring the ‘lifetime’ label and sticking to a real-world car service checklist that includes these fluids every 60,000 miles. Many people get caught up in the truth about 10000 mile oil change intervals, but they completely neglect the transmission fluid that keeps their most expensive component alive.
Stop Babying Your New Brake Pads
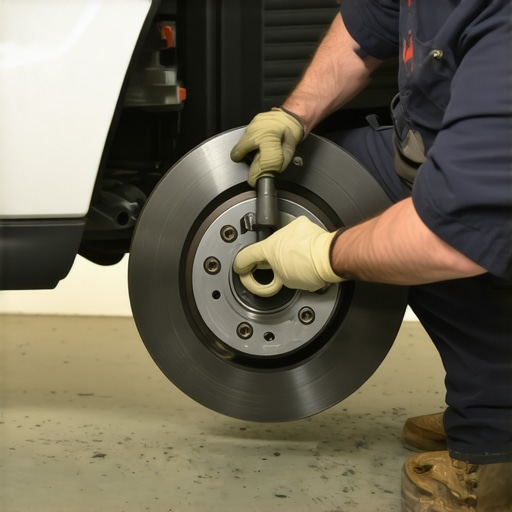
Here is a classic ‘oops’ factor that even experienced DIYers fall for: being too gentle after a brake job. Most drivers think they are protecting their investment by braking softly for the first few hundred miles. This is a massive mistake that leads to glazed rotors and significantly reduced stopping power. You actually need to perform a series of controlled, aggressive thermal cycles to transfer a uniform layer of pad material onto the rotor surface. If you do not follow the simple way to bed in new brake pads, you will likely end up wondering why your brake rotors keep warping every few months. According to research by the Society of Automotive Engineers (SAE), failing to establish this transfer layer is the leading cause of ‘brake judder’—a condition often misdiagnosed as warped metal when it is actually just uneven pad deposits creating a bumpy surface.
How can over-servicing actually damage your modern engine?
It sounds counterintuitive, but there is a point of diminishing returns where ‘extra’ maintenance becomes harmful. For example, using aggressive engine flushes or excessive high-mileage additives can sometimes swell delicate gaskets or strip away necessary anti-friction coatings in high-precision modern engines. Instead of looking for a ‘magic bottle’ fix, focus on how regular tune-ups improve fuel efficiency and safety through basic mechanical integrity and clean sensors. Understanding brake system repairs and engine diagnostics requires a surgical approach, not a sledgehammer. Have you ever fallen into the ‘lifetime fluid’ trap or had a shop tell you a service was unnecessary, only to have the part fail shortly after? Let me know in the comments—I am curious to see how many of us have been led astray by those ‘maintenance-free’ promises!
Buy a Scanner That Actually Talks Back
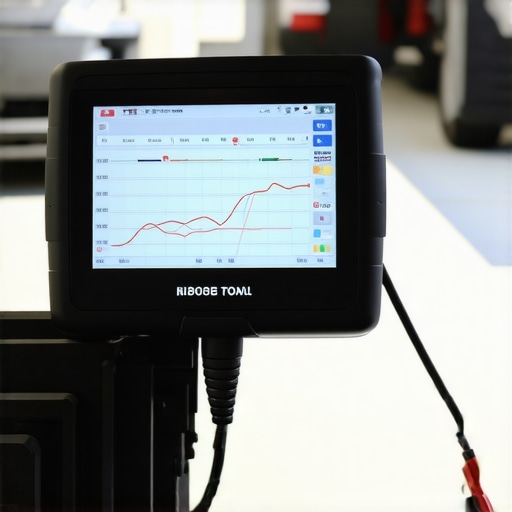
The days of fixing a car with just a set of sockets and a good ear are fading fast. If you’re serious about your own garage work, the single most important tool you can own isn’t a wrench—it’s a bi-directional scan tool. I spent years using a cheap $20 dongle that just cleared codes, but that’s like trying to perform surgery with a flashlight. A real tool allows you to command the car’s computer. For example, if you are troubleshooting common auto repair issues before visiting the shop, you can tell the computer to turn on the fuel pump or open a specific vent. This saved me a $600 repair bill last year when I was able to prove a solenoid was stuck rather than the entire transmission being toast. It’s the only way to truly know how to tell if your computer is giving you a false error code.
Stop Guessing with the Elbow Click
I used to be the guy who tightened every bolt until my elbow clicked, thinking that was ‘tight enough.’ That’s a one-way ticket to a snapped stud or a warped head. Precision is the name of the game for modern aluminum engines. When you tune up your car for peak performance, every spark plug and valve cover bolt has a specific torque spec for a reason. Using a high-quality torque wrench is the trick to replacing a spark plug without stripping threads. Even a tiny variation can lead to a compression leak or, worse, a cracked block. I personally use a split-beam torque wrench because they don’t need to be wound down to zero after every use, which keeps them calibrated longer. Accuracy isn’t a luxury; it’s a requirement for maximizing your cars lifespan with expert tune-up strategies.
How do I keep my car’s computer system healthy over the long haul?
Maintenance in 2024 and beyond isn’t just about oil; it’s about voltage. Modern cars are rolling networks of computers that are incredibly sensitive to electrical noise. I’ve found that the best way to prevent ‘ghost’ codes is to keep the battery terminals chemically clean and ensure your ground wires are solid. According to technical documentation from Bosch Mobility Solutions, over 30% of ‘faulty’ electronic components replaced in shops are actually functional—the real issue was a drop in voltage or a poor ground connection. This is a major part of the auto repair trends to watch in 2025. As cars become more connected, we will likely see ‘over-the-air’ maintenance where your car downloads a software patch for a transmission shift point before you even feel a shudder.
The future of DIY is shifting toward data management. We are entering an era where AI-driven diagnostics will analyze vibration patterns in your suspension through your smartphone’s sensors to tell you a ball joint is wearing out. It sounds like science fiction, but it is the logical next step for how regular tune-ups improve fuel efficiency and safety through proactive care. If you want to stay ahead, stop buying ‘magic’ oil additives and start investing in the software side of your machine. My advanced tip for you: download a dedicated diagnostic app for your specific car brand (like VCDS for VW or BimmerCode for BMW) and do a full ‘health report’ scan once a month. You will catch tiny glitches before they turn into dashboard light shows.
I still remember the sinking feeling in my gut when I rolled my winter tires out of the shed last November. I’d spent nearly a thousand bucks on those grippy beauties, only to find them covered in fine, spider-web cracks. I thought I was being smart by just “keeping them out of the way,” but I’d basically left them to bake in a makeshift oven. It was a classic rookie mistake, much like the time I realized why my car actually failed its inspection. It turns out, rubber is a lot more sensitive than we give it credit for, and if you treat your off-season set like scrap metal, they’ll reward you by failing when you need them most.
My $800 Mistake and Why Your Tires Need a Proper Summer Vacation
The truth is, your tires are “alive” in a chemical sense. They contain oils and antioxidants that keep the rubber supple. When you leave them sitting in a hot garage or, heaven forbid, outside under a tarp, those oils evaporate. I learned the hard way that temperature fluctuations do more damage than thousands of miles of driving. It’s a lot like skipping a standard car service checklist; you don’t notice the damage until it’s too late to fix it. Today, I’m going to show you exactly how to prep, bag, and stack your tires so they stay as fresh as the day you bought them.
Are those expensive storage bags actually worth the hype?
I used to think those airtight tire bags were just a gimmick designed to separate enthusiasts from their cash. I was skeptical, thinking a heavy-duty trash bag would do the same job. But after seeing how much better my second set held up, I’m a convert. According to experts at Tire Rack, the goal is to prevent the lubricating oils within the tire from evaporating, and a truly airtight seal is the only way to do that. If you’ve ever wondered how to read the date code on your tires, you already know that tires have a shelf life—proper storage just ensures you actually get to use all those years.
Stop the Rot Before It Starts
Before you even think about where to put them, you have to get the grime off. Brake dust is incredibly corrosive; if you let it sit on your rims for six months, it’ll eat right through the finish. I always take a few extra minutes to give them a deep clean. Have you ever struggled with tires that look “old” even though they have plenty of tread left? That’s usually down to poor storage prep. It’s just as vital as knowing the hidden benefit of rotating tires every few thousand miles. You’re protecting your investment.
Have you ever pulled your tires out of storage only to find them looking worse for wear? Drop a comment and let me know if you’ve dealt with dry rot—I’d love to hear I’m not the only one who learned this lesson the hard way!
I learned the hard way that you can’t just toss tires into a corner and hope for the best. To keep the rubber from turning into a brittle, useless mess, you need a process. It starts with a deep scrub. Most people don’t realize that brake dust is actually metallic and acidic; if you let it sit on your rims for months, it doesn’t just stain—it pits the metal. I once spent an entire Saturday morning with a toothbrush and a bucket of soapy water because I’d ignored the best way to clean wheels without ruining the coating the previous year. Use a mild detergent and make sure they are bone-dry before you even think about the next step. Any moisture trapped in a storage bag is just an invitation for corrosion and rot.
Vacuum Seal Your Tires Like Leftover Steak
This is where the magic happens. The goal of bagging isn’t just to keep your garage floor clean; it’s to stop the air from circulating. Tires are constantly ‘off-gassing’ their essential oils. By placing each tire in a heavy-duty, airtight plastic bag and sucking the air out with a vacuum cleaner, you create a time capsule for the rubber. It’s a precision move that ranks right up there with knowing expert tune-up strategies for longevity. I’ve found that using a shop vac to pull the air out before taping the bag shut keeps the rubber significantly more supple. While some people swear by filling them with special gases, the truth about nitrogen in your tires is that a solid airtight seal in a standard bag does 90% of the heavy lifting for the average driver.
Stack Them or Hang Them Based on the Rim
How you physically position the tires depends entirely on whether they are still mounted on the rims. If they are on the wheels, you should actually hang them from hooks or stack them vertically. The rim provides the structural support needed to prevent flat spots. However, if you are storing just the rubber carcasses without rims, never hang them. This will distort the bead and make them a nightmare to balance later. You might even find why your car pulls hard to the right after new tires is simply because the bead was deformed during a winter in the shed. For unmounted tires, standing them upright in a row like books on a shelf is the gold standard.
Find a Climate-Controlled Sweet Spot
Temperature is the silent killer of performance rubber. I used to store mine in a garden shed that felt like a sauna in July. By September, the sidewalls looked like a dried-out lakebed. You want a cool, dry, and dark location. Basements are usually better than garages because they lack the massive temperature swings. Also, keep them away from electric motors—like your furnace or sump pump. These motors produce ozone, which is an absolute nightmare for tire compounds. Taking these precautions is just as vital as scheduling regular maintenance; it’s all about protecting the parts that keep you on the road. Think of your storage area like a cellar for fine wine; if it’s too hot for you to be comfortable, it’s definitely too hot for your Michelins. Just as you’d be diligent about understanding brake system repairs to ensure safety, proper storage ensures your tires don’t fail you at 70 mph.
While mastering tire storage saves you a few hundred bucks, applying that same ‘low-effort’ logic to the rest of your vehicle can be a catastrophic mistake. In my years of turning wrenches, I’ve seen more damage caused by following ‘official’ marketing schedules than by skipping a single oil change. We need to look past the surface level if we really want to maximize your cars lifespan with expert tune-up strategies. It is about understanding the chemical and mechanical realities of your machine, rather than just checking boxes on a generic form.
The Dangerous Myth of Lifetime Fluids
The biggest lie in modern automotive maintenance is the concept of ‘lifetime’ fluid. Whether it is your transmission, differential, or cooling system, manufacturers often claim these fluids never need replacing. It sounds great on a sales brochure because it lowers the perceived cost of ownership, but it is a mechanical death sentence. In reality, no fluid is immune to heat cycles, oxidation, and shear. By the time you realize your transmission is slipping or your gears are whining, the internal damage is often irreversible. I always recommend ignoring the ‘lifetime’ label and sticking to a real-world car service checklist that includes these fluids every 60,000 miles. Many people get caught up in the truth about 10000 mile oil change intervals, but they completely neglect the transmission fluid that keeps their most expensive component alive.
Stop Babying Your New Brake Pads
Here is a classic ‘oops’ factor that even experienced DIYers fall for: being too gentle after a brake job. Most drivers think they are protecting their investment by braking softly for the first few hundred miles. This is a massive mistake that leads to glazed rotors and significantly reduced stopping power. You actually need to perform a series of controlled, aggressive thermal cycles to transfer a uniform layer of pad material onto the rotor surface. If you do not follow the simple way to bed in new brake pads, you will likely end up wondering why your brake rotors keep warping every few months. According to research by the Society of Automotive Engineers (SAE), failing to establish this transfer layer is the leading cause of ‘brake judder’—a condition often misdiagnosed as warped metal when it is actually just uneven pad deposits creating a bumpy surface.
How can over-servicing actually damage your modern engine?
It sounds counterintuitive, but there is a point of diminishing returns where ‘extra’ maintenance becomes harmful. For example, using aggressive engine flushes or excessive high-mileage additives can sometimes swell delicate gaskets or strip away necessary anti-friction coatings in high-precision modern engines. Instead of looking for a ‘magic bottle’ fix, focus on how regular tune-ups improve fuel efficiency and safety through basic mechanical integrity and clean sensors. Understanding brake system repairs and engine diagnostics requires a surgical approach, not a sledgehammer. Have you ever fallen into the ‘lifetime fluid’ trap or had a shop tell you a service was unnecessary, only to have the part fail shortly after? Let me know in the comments—I am curious to see how many of us have been led astray by those ‘maintenance-free’ promises!
Buy a Scanner That Actually Talks Back
The days of fixing a car with just a set of sockets and a good ear are fading fast. If you’re serious about your own garage work, the single most important tool you can own isn’t a wrench—it’s a bi-directional scan tool. I spent years using a cheap $20 dongle that just cleared codes, but that’s like trying to perform surgery with a flashlight. A real tool allows you to command the car’s computer. For example, if you are troubleshooting common auto repair issues before visiting the shop, you can tell the computer to turn on the fuel pump or open a specific vent. This saved me a $600 repair bill last year when I was able to prove a solenoid was stuck rather than the entire transmission being toast. It’s the only way to truly know how to tell if your computer is giving you a false error code.
Stop Guessing with the Elbow Click
I used to be the guy who tightened every bolt until my elbow clicked, thinking that was ‘tight enough.’ That’s a one-way ticket to a snapped stud or a warped head. Precision is the name of the game for modern aluminum engines. When you tune up your car for peak performance, every spark plug and valve cover bolt has a specific torque spec for a reason. Using a high-quality torque wrench is the trick to replacing a spark plug without stripping threads. Even a tiny variation can lead to a compression leak or, worse, a cracked block. I personally use a split-beam torque wrench because they don’t need to be wound down to zero after every use, which keeps them calibrated longer. Accuracy isn’t a luxury; it’s a requirement for maximizing your cars lifespan with expert tune-up strategies.
How do I keep my car’s computer system healthy over the long haul?
Maintenance in 2024 and beyond isn’t just about oil; it’s about voltage. Modern cars are rolling networks of computers that are incredibly sensitive to electrical noise. I’ve found that the best way to prevent ‘ghost’ codes is to keep the battery terminals chemically clean and ensure your ground wires are solid. According to technical documentation from Bosch Mobility Solutions, over 30% of ‘faulty’ electronic components replaced in shops are actually functional—the real issue was a drop in voltage or a poor ground connection. This is a major part of the auto repair trends to watch in 2025. As cars become more connected, we will likely see ‘over-the-air’ maintenance where your car downloads a software patch for a transmission shift point before you even feel a shudder.
The future of DIY is shifting toward data management. We are entering an era where AI-driven diagnostics will analyze vibration patterns in your suspension through your smartphone’s sensors to tell you a ball joint is wearing out. It sounds like science fiction, but it is the logical next step for how regular tune-ups improve fuel efficiency and safety through proactive care. If you want to stay ahead, stop buying ‘magic’ oil additives and start investing in the software side of your machine. My advanced tip for you: download a dedicated diagnostic app for your specific car brand (like VCDS for VW or BimmerCode for BMW) and do a full ‘health report’ scan once a month. You will catch tiny glitches before they turn into dashboard light shows.
What My Most Expensive Mistakes Taught Me About Maintenance
Looking back at years of grease-stained knuckles, the biggest takeaway isn’t a specific technique; it’s a mindset. First, never ignore a ‘new’ sound. That faint whistle or rhythmic thud is your car’s way of asking for help before it becomes a three-digit repair bill. Second, cleanliness isn’t just for looks. Wiping down components while you work reveals leaks and cracks you’d never see under a layer of grime. Finally, remember that preventative care is cheaper than a tow truck. Whether you are following a car service checklist or just checking your oil every Sunday, consistency beats intensity every time.
#IMAGE_PLACEHOLDER_E#
The Three Tools I Won’t Start a Job Without
If you want to move from “parts changer” to a real diagnostic pro, you need to invest in quality. I personally recommend the BlueDriver Bluetooth Scan Tool; it’s affordable and specifically designed for DIYers who need to know how to tell if your computer is giving you a false error code. Next, a split-beam torque wrench from a brand like Precision Instruments is a life-changer—it stays calibrated and doesn’t require the constant resetting of click-type wrenches. Lastly, always keep a copy of a factory service manual for your specific VIN. This is the secret to maximizing your cars lifespan with expert tune-up strategies because it gives you the exact specs the engineers intended.
Your Journey Toward Mechanical Mastery Starts Now
Taking care of your vehicle doesn’t have to be an intimidating chore reserved for professionals. By mastering small tasks like proper tire storage or learning the simple way to bed in new brake pads, you are building a relationship with your machine that pays dividends in safety and reliability. Every time you pop the hood, you’re gaining experience that makes you a more informed owner. Don’t let the complexity of modern auto repair scare you off—at the end of the day, it’s still just nuts, bolts, and data. You’ve got this.
Have you ever had a “lightbulb moment” where a simple maintenance trick saved you a fortune? Let me know in the comments below—I’d love to hear your success stories!