
I’ll never forget the looks I got at the drive-thru last summer. Every time I touched the pedal, my sedan let out a piercing shriek that sounded like a subway train coming to a screeching halt. I had just finished a DIY brake system repair, feeling pretty proud of myself for snagging the Value Grade pads for under twenty bucks. I thought friction material was just friction material, regardless of the price tag. Man, was I wrong. My savings quickly turned into a daily exercise in frustration and social embarrassment. It was the kind of noise that makes you want to duck your head and hide behind the steering wheel.
Why I Finally Stopped Buying the Cheapest Brake Pads
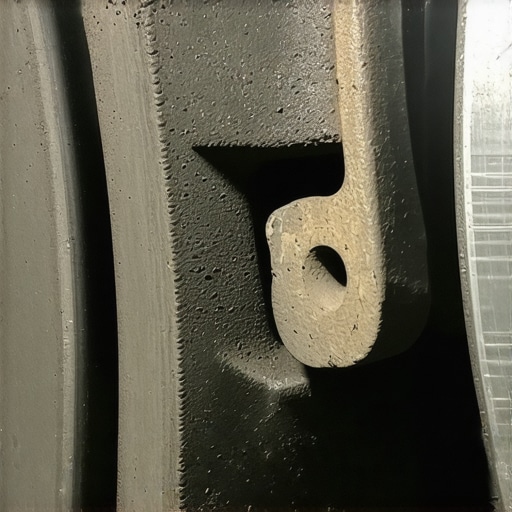
The reality is that those bargain-bin specials are often made with low-grade metallic fillers and poor-quality resins. When they get hot—and brakes always get hot—those materials can break down or outgas, leading to that dreaded high-pitched vibration. It wasn’t just about the noise, though. I noticed my wheels were constantly coated in a thick, black soot that seemed impossible to clean. If you have ever wondered why your new brakes are still squealing despite having plenty of meat left on the pads, the answer is usually hiding in the quality of the friction compound itself. I learned the hard way that you aren’t just paying for the brand name; you are paying for the engineering that keeps your commute quiet. According to the Friction Materials Standards Institute, there are hundreds of different friction formulas, each designed for specific vehicle weights and heat ranges. When a manufacturer cuts corners to hit a low price point, the first things to go are the sophisticated shims and the high-quality chamfers that dampen vibration. I thought I was being a savvy home mechanic, but I was really just setting myself up for a brake inspection that eventually forced me to buy a second, better set of pads just to keep my sanity.
Is saving thirty bucks actually worth the headache?
When you are standing at the counter and the clerk offers you the $19.99 set versus the $55.00 Premium set, the temptation to save a few bucks is real. But think about the hours you will spend taking the wheels back off when the noise becomes unbearable. Have you ever had a set of pads that sounded like a freight train even though they were brand new? It is a common trap we all fall into. We often focus so much on the scheduled maintenance aspect that we forget the quality of the parts matters just as much as the labor. Beyond the noise, cheap pads can also lead to uneven heat distribution. I actually ended up with a shimmy in my steering wheel because the cheap pads left irregular deposits on the discs. I spent weeks trying to figure out why my rotors kept warping before I realized the pads were the true culprit. Don’t make my mistake; investing in a mid-grade or premium pad usually pays for itself in longevity and peace of mind.
The Right Way to Prep Your Hub and Rotors
Before you even think about sliding those new pads into the calipers, you have to treat the wheel hub like a sterile operating room. I used to just slap the pads in and call it a day, but I learned that even a tiny bit of rust scale between the rotor and the hub can cause lateral runout. Think of it like a piece of sand in your shoe; you might not feel it immediately, but after a mile, it is all you can think about. Use a wire brush to scrub the hub surface until it shines. If you do not, you will likely find yourself wondering why your car pulses every time you hit the brakes a few months down the road.
Ditch the Old Hardware Every Single Time
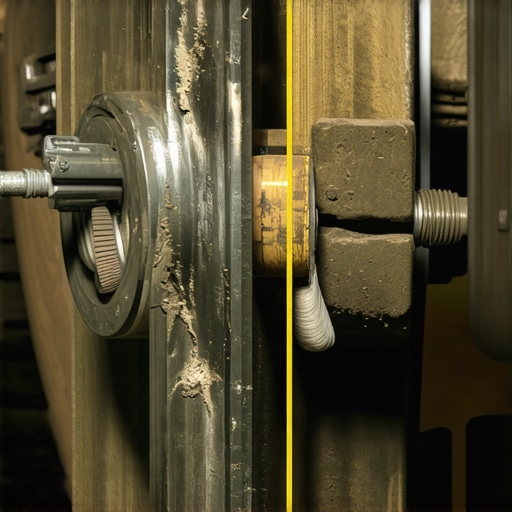
Most premium brake kits come with new stainless steel clips and shims for a reason. These tiny pieces of metal act as the tracks for your brake pads. Over time, heat cycles and road salt turn them into a gritty mess that prevents the pads from retracting properly. I once tried to save five minutes by reusing the old, crusty clips on my truck. Two weeks later, one pad had worn down to the metal while the other looked brand new because it was stuck in the “on” position. Replacing these is a critical part of any scheduled maintenance routine. While you are in there, take a second to learn how to spot a leaking brake caliper before it fails, as a seized piston will ruin even the most expensive set of ceramic pads.
Grease Only Where It Matters
Lubrication is a double-edged sword in the braking world. You want high-temperature ceramic grease on the back of the pads (where they touch the caliper piston) and on the slide pins, but keep it far away from the friction material. Think of slide pins like the hinges on a door; if they are dry or gummed up, the door will not swing. I usually pull the pins completely, wipe off the old, dried-up gunk, and apply a thin layer of fresh silicone-based lubricant. This ensures the caliper can “float” and apply even pressure. If the pins are stuck, you will get that uneven wear that mimics a need for a tune-up or alignment.
Check the Rest of the Neighborhood
Since you already have the car on jack stands and the wheels off, do not waste the opportunity to play detective. Grab the rotor at the 9 and 3 o’clock positions and give it a firm shake. If there is play, you might be dealing with more than just a brake issue. I have seen people spend a fortune on pads only to realize how to check your tie rod ends with minimal tools would have revealed the true source of their steering shimmy. Look at the rubber boots on your CV axles too; a small tear now is a cheap fix, but waiting until it clicks means an expensive replacement. It is all about the car service checklist that keeps the whole machine in harmony.
The Secret Art of Bedding Your Brakes
Once everything is bolted back together, you are not done. The “bed-in” process is where you actually transfer a thin layer of friction material from the pad onto the rotor. I remember the first time I did this on a deserted backroad. I had to perform five or six aggressive decelerations from 45 mph down to 10 mph without coming to a complete stop. If you stop completely while the pads are scorching hot, you will leave a “pad print” on the rotor, which is the primary reason for those annoying vibrations. Doing this correctly can debunk many brake service myths about “warped” rotors. Finally, make sure you use a torque wrench on your wheels; knowing the correct way to torque lug nuts is the final step in ensuring your quiet, smooth ride stays that way for thousands of miles.
Stop treating your engine like a simple lawnmower
Most people think a tune-up is just about swapping out spark plugs and filters. In the modern era, that is a dangerous oversimplification. I have seen countless DIYers get frustrated when they realize expert tune-up strategies are more about interpreting data than just turning a wrench. The common belief is that if the check engine light is off, the car is ‘fine.’ However, internal combustion is a delicate dance of fuel trims and sensor feedback. If your air-fuel ratio is slightly off, you might not get a code, but you are slowly killing your catalytic converter. This is how regular tune-ups improve fuel efficiency and safety—by catching those ‘soft’ failures before they become hard, expensive ones. Modern engines use adaptive learning to compensate for wear, meaning they can mask a problem until it becomes a catastrophe.
The expensive trap of the parts cannon
We have all been there: the car stumbles, we Google the symptoms, and we start buying every sensor under the hood. I call this ‘firing the parts cannon.’ If you get a misfire code, do not just buy six new coils. Understanding what a P0300 code really means for your wallet is about realizing that a vacuum leak or a failing fuel pump can cause the same symptoms as a bad plug. I once spent $400 on sensors only to find a $5 rubber hose had a tiny crack. This is why troubleshooting common auto repair issues before visiting the shop is critical. According to a study by the Car Care Council, nearly 80% of vehicles on the road need at least one service or repair, yet many of those are misdiagnosed by owners who rely on guesswork rather than testing. You have to test the circuit, not just replace the component.

Why do your rear brakes wear out faster than the fronts?
It used to be a universal truth: front brakes do 70% of the work, so they wear out first. But if you own a modern vehicle with Electronic Brake-force Distribution (EBD), you might be shocked to find your rear pads are toast while the fronts look brand new. Many drivers assume there is a mechanical failure or a seized caliper, but this is actually a design choice by engineers to reduce ‘nose dive’ during light braking and improve stability. Understanding the real reason your rear brakes wear faster than fronts can save you from a lot of unnecessary stress and misdiagnosis. It is one of those brake service myths that leads people to replace perfectly good master cylinders. When you dig deeper, you realize that your car’s computer is actually using the rear brakes to keep the chassis level and the ride smooth. Have you ever fallen into this trap of replacing parts that weren’t actually broken? Let me know in the comments!
The hidden nuance of ghost electrical leaks
One of the most advanced mistakes I see is ignoring the electrical side of ‘mechanical’ problems. A car that hesitates might not have a fuel problem at all; it might have a bad ground or a ‘parasitic drain.’ I spent weeks chasing a fuel pressure issue on an old SUV before professional diagnostics found my ghost electrical leak that was dropping the voltage to the fuel pump just enough to cause a stumble during acceleration. Real expertise comes from knowing that every system in a modern vehicle is interconnected. Whether you are performing brake system repairs or trying to fix a rough idle, always look for the root cause instead of just treating the symptom. Being a better mechanic means being a better detective, and sometimes that means putting down the socket set and picking up a multimeter.
I used to think my basic $20 OBD-II code reader was all I needed to be a ‘pro’ at home. Then I ran into a cooling issue that no code could solve. I realized that to truly master troubleshooting common auto repair issues before visiting the shop, you need tools that talk back to the car. I upgraded to a mid-range scan tool with bidirectional control, and it changed everything. Instead of guessing if a cooling fan was dead, I could literally tap a button on the screen and force the car to turn it on. If it didn’t spin, I knew the motor was toast; if it did, I knew I was chasing a sensor or a relay. This level of precision is exactly how I’ve managed to keep my daily driver on the road long after most people would have traded theirs in.
Stop chasing codes and start testing circuits
The biggest mistake I see DIYers make is trusting a ‘P-code’ as a definitive diagnosis. A code is just a starting point, a clue left by the computer. To get results like the pros, you have to verify the physical reality of the situation. I always keep a high-quality multimeter and a power probe in my top drawer. For instance, before you replace a battery because the car won’t crank, you should test battery strength at home using a dedicated load tester, not just a voltage meter. A battery can show 12.6 volts but have zero cranking amps left. It is these small distinctions—the difference between ‘voltage’ and ‘load’—that separate a successful repair from a wasted Saturday and a lighter wallet.

Looking ahead, the landscape of the home garage is shifting rapidly. When I look at the auto repair trends to watch in 2025, it is clear that software is becoming as important as the wrench. We are moving toward ‘software-defined vehicles’ where a simple expert tune-up strategy might involve updating firmware rather than just gapping spark plugs. As detailed in the Bosch Automotive Handbook (11th Edition), the sheer volume of data moving across a vehicle’s CAN bus system today is staggering, often exceeding several gigabytes per hour of driving. In the future, being a ‘car guy’ or ‘car girl’ will require being part-time IT support for your own engine bay.
How do I maintain my car’s health over several years?
Consistency is the only ‘magic’ trick that exists in the automotive world. I treat my maintenance log like a sacred text. People ask me the truth about why my car finally hit 200,000 miles, and the answer is always the same: I never deferred a service. When the manual says change the fluid, I change it. I’ve learned that I’ll never skip a transmission fluid change again because the $150 in fluid is a lot cheaper than a $4,000 rebuild. You have to tune up your car for peak performance by looking at the small things, like cleaning your MAF sensor or throttle body, which keeps the fuel trims perfect and prevents carbon buildup.
If you want to take your skills to the next level today, stop looking at your car as a collection of parts and start looking at it as a series of systems. My challenge to you: next time you have a spare thirty minutes, don’t wait for a light to come on. Open your hood and perform a full car service checklist inspection. Check your own vacuum lines for tiny cracks and use a multimeter to check your alternator output. Catching one small fault now is how you avoid a breakdown later. Your car—and your bank account—will thank you for the pro-active detective work.
The Expensive Lessons My Ego Tried to Ignore
If there is one thing I’ve learned after a decade in the driveway, it is that your ‘gut feeling’ is usually a terrible mechanic. I spent years thinking I could outsmart the engineers by skipping steps, but the road always wins. For example, I used to ignore a slight pull in the steering because I thought it was just the road crown, but knowing the real reason your car pulls under heavy braking saved me from a major hardware failure later on. Another lightbulb moment was realizing that ‘clean’ isn’t clean enough. If you leave even a fingerprint of oil on a new rotor, you are essentially baking a failure into your next drive. Finally, never assume a part is good just because it is new; ‘out of the box’ does not mean ‘out of the woods.’ Always test before you torque.
Gear That Makes Me a Better Mechanic
You don’t need a professional lift to get professional results, but you do need the right data. I never start a complex job without my multimeter; it’s the only way to avoid the ‘parts cannon.’ I also swear by a DIY smoke machine—you can find the simple way to check for vacuum leaks with smoke and save yourself hours of chasing phantom idle issues. For anyone serious about their own brake system repairs, a set of silicone-based ceramic brake grease is non-negotiable. It doesn’t swell rubber seals like petroleum grease does, which is a mistake that kills thousands of calipers every year. If you are hearing a roar while driving, learning the secret to diagnosing a bad wheel bearing fast can help you decide which tool to grab next.
Step Out of the Driveway with Confidence
The transition from a frustrated driver to a confident home mechanic doesn’t happen overnight, but it starts with the first bolt you turn correctly. Every time you follow a proper car service checklist, you are building a relationship with your machine that most people never experience. You aren’t just performing a standard car service; you are ensuring your family’s safety and your own peace of mind. Don’t be afraid to get your hands dirty—just make sure you’re doing it with the right knowledge by your side. Modern vehicles are complex, but they aren’t impossible to master if you take it one system at a time.
Have you ever spent hours on a repair only to realize the problem was something incredibly simple like a loose wire? Let me know your biggest ‘face-palm’ moment in the comments below!