

I stood there staring at the ignition of my old sedan, holding a jagged piece of silver metal that used to be my way home. It was 9:00 PM, raining, and my ‘quick trip’ to the store had just turned into a nightmare. My first mistake? I tried to shove the broken half back in, thinking I could still make it turn. All I did was push the broken fragment deeper into the cylinder. If you’re looking at your dashboard right now with that same sinking feeling, take a deep breath. You haven’t ruined your car, and you likely don’t need to call a tow truck yet. We’re going to get that piece out together, and I’ll show you exactly how I learned the hard way so you don’t have to.
Put the Screwdriver Down and Step Away from the Dash
The absolute worst thing you can do right now is panic-poke at the ignition. When I first dealt with this, I thought a flathead screwdriver and some brute force would solve it. I was wrong. I ended up marring the delicate internal tumblers, which eventually led to a much more expensive scheduled maintenance headache later on. Most people assume the key is jammed in there with incredible force, but usually, it’s just sitting there, trapped by the pins. Getting a broken key out is about finesse, not power. It’s a lot like troubleshooting common auto repair issues; you need the right angle and the right tool. According to data from various automotive roadside studies, modern ignition cylinders are more complex than older models, meaning improper extraction can easily trigger an anti-theft lockout. That is a bill you definitely want to avoid. Have you ever snapped a key or a tool inside a lock before? It’s a rite of passage for DIYers, but it’s one we want to finish quickly.
Will This Method Destroy My Ignition Cylinder?
It’s a fair question to be skeptical. You’re sticking foreign objects into a very expensive part of your steering column. However, if you follow the steps I’m laying out, you’re actually applying less pressure to the components than you do every time you turn the car on. We aren’t prying; we’re extracting. Think of it as an emergency addition to your tune-up strategies. Before we dive into the hacks involving jigsaw blades and pliers, we need to make sure the car is actually in the right ‘state’ to let go of that key. If the cylinder isn’t in the ‘Lock’ or ‘Off’ position, those internal pins are going to grip that fragment like a vise. Sometimes, a simple check of your ground wire or battery status helps ensure the solenoid isn’t locking the cylinder in place electronically.
How to Fish Out the Metal Without Calling a Locksmith
Before you even touch a tool, we need to reduce friction. I once spent forty minutes fighting a key fragment that was practically welded to the tumblers by old, sticky residue. A quick spray of dry graphite or even a tiny bit of WD-40 can make the difference between a five-minute fix and a two-hour ordeal. Think of it as a crucial part of your car service checklist; keeping those internal components slick prevents the kind of resistance that snaps keys in the first place.
Why a Thin Jigsaw Blade is Your Secret Weapon
If the key is snapped off flush with the face of the cylinder, you can’t grab it with pliers. This is where a thin jigsaw or scroll saw blade comes in. You want the kind with the smallest teeth possible. Slide the blade into the keyway alongside the broken fragment, making sure the teeth are facing toward you. Once the blade is in deep enough, give it a slight twist so the teeth bite into one of the cuts on the key fragment. 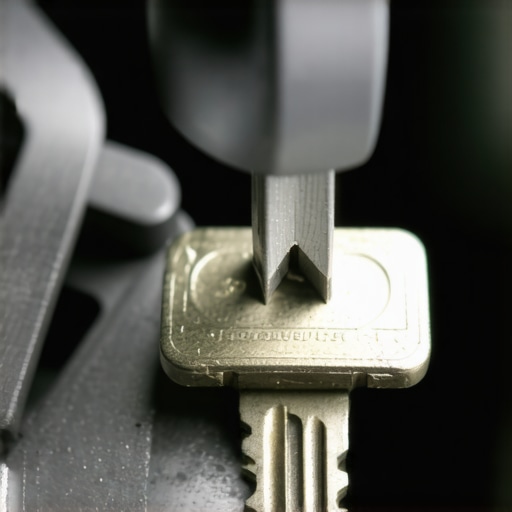
Executing the Surgical Pull
I remember my hands shaking the first time I tried this on a friend’s old pickup. I was terrified I would snap the saw blade and double my problems. But when I felt that tiny click of the teeth catching the brass, I knew I had it. You have to pull straight back with a steady, slow motion. If you jerk it, you will lose your grip. This is much like troubleshooting common auto repair issues where patience beats power every time. If the fragment moves even a millimeter, you have won half the battle.
Dealing with a Deeply Recessed Break
Sometimes the key snaps so deep that even a saw blade struggles to reach. If you find yourself in this spot, do not keep jamming tools in. This is when you check if the cylinder is actually in the Off position. If it is stuck in Accessory, the steering lock might be putting side-pressure on the fragment. I have seen people assume they have a bad ground wire or battery issue because the car won’t start, when really the ignition is just physically jammed. Jiggle the steering wheel slightly while you pull; sometimes that release of tension is all the fragment needs to slide out. If you are also noticing the car behaving oddly elsewhere, it might be time for more thorough tune-up strategies once the key is out.
Now that you’ve hopefully retrieved that broken metal fragment, it’s time to address the bigger picture. Most drivers assume a snapped key is just a stroke of bad luck, but in my experience, it’s usually a symptom of a neglected ignition cylinder that has been struggling against grit and friction for years. This brings us to a much larger issue in the DIY world: the ‘parts-only’ maintenance mindset. People often think that if they replace a component, the job is finished. However, the most sophisticated maintenance isn’t about what you replace; it’s about the variables you control during the process. For instance, while many swear by frequent oil changes, you should really investigate the truth about 10000-mile oil change intervals to understand how modern synthetic chemistry actually works. It is not just about the mileage; it is about the thermal cycles and the additives that prevent sludge.
The Brake Fluid Trap That Ruins Master Cylinders
Everyone focuses on the thickness of their brake pads, but the real ‘oops’ factor that catches even seasoned DIYers is the hygroscopic nature of brake fluid. It’s a fancy word that means the fluid literally sucks moisture out of the air. Over time, that moisture lowers the boiling point of the fluid and corrodes the internals of your calipers. I’ve seen countless people perform a perfect pad swap only to wonder why your brake fluid looks like coffee creamer just a few months later. According to a study by the Car Care Council, nearly 20% of vehicles on the road have contaminated brake fluid that needs immediate attention. If you ignore the fluid, you’re essentially leaving a ticking time bomb in your hydraulic system, leading to a soft brake pedal that mechanics keep missing because they are too focused on the hardware and not the chemistry.

How Do You Properly Bed Your New Brakes?
One of the most common myths I hear is that you should ‘take it easy’ on new brakes for the first few hundred miles. I’ve found that the opposite is true if you want maximum performance and longevity. You need to perform a specific ‘bedding’ procedure to transfer a thin layer of friction material from the pads to the rotors. If you don’t, you’ll likely experience vibrations or ‘warped’ rotors that aren’t actually warped—they just have uneven pad deposits. This is one of the most overlooked brake service myths. Learning the proper way to break in new brake pads and rotors involves a series of controlled stops that heat the components up without coming to a full standstill. It’s a nuance that separates a driveway amateur from someone who understands vehicle dynamics. Have you ever fallen into the trap of assuming new parts work perfectly right out of the box? Let me know in the comments. Moving forward, always remember that maximizing your car’s lifespan with expert tune-up strategies requires looking past the surface and understanding the ‘why’ behind the ‘how.’
If you are serious about graduating from the guy with a random wrench to a true backyard technician, you have to stop guessing your bolt tightness. I used to think my calibrated elbow was good enough until I snapped a water pump bolt and spent four hours drilling it out. Now, I won’t touch a suspension component or a spark plug without my split-beam torque wrench. Knowing the proper way to torque wheel bolts without a manual is a great starting point, but having a tool that handles the math for you is better. When you’re dealing with aluminum heads or magnesium casings, the difference between tight and stripped is often just a fraction of a turn. I personally swear by the Precision Instruments C3R150FR because it doesn’t require you to wind it down to zero after every use, which is a common way people ruin their cheaper clicker-style wrenches.
Get a Digital Torque Wrench If You Love Your Bearings
We are also moving into an era where mechanical skill simply isn’t enough. As we look at auto repair trends to watch in 2025, it is abundantly clear that the scan tool is the new 10mm socket. I personally use an OBDLink MX+ adapter paired with manufacturer-specific software like Forscan for Fords or VCDS for the Volkswagen group. This setup allows me to perform the same bi-directional tests a dealer does, such as the DIY way to test a transmission solenoid at home. If you aren’t checking for pending codes before they trip a dashboard light, you are always playing defense rather than offense with your car’s health. 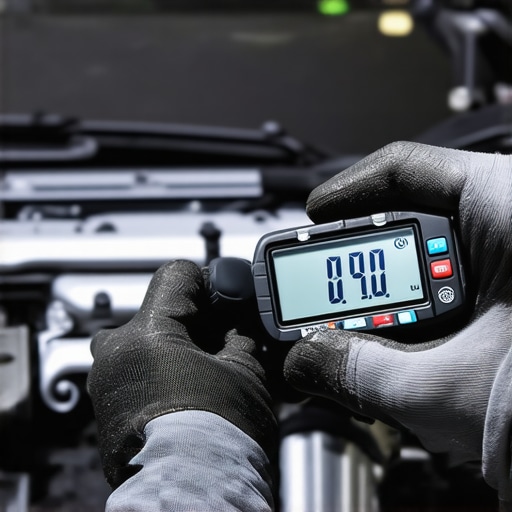
How do I maintain my car’s precision over the long haul?
The secret is data logging. Every six months, I plug in my scanner and record the fuel trims at idle and under load. This acts as a baseline. If those numbers start drifting, I know I have a vacuum leak or a failing sensor months before the car starts stumbling. This level of attention is the secret to getting 200000 miles out of your original engine. It’s not just about changing the oil; it’s about monitoring the health of the combustion cycle. Bosch’s technical documentation on ADAS (Advanced Driver Assistance Systems) highlights that even a minor suspension change can throw off safety sensors, so you must also know how to tell if your local mechanic actually has the tools for a proper ADAS calibration after any major front-end work.
The 2025 Reality of Software Locked Maintenance
Looking ahead, I predict that ‘right to repair’ will be fought on the software front rather than the hardware one. We are already seeing components that require a handshake with the central server to function after replacement. This makes how regular tune-ups improve fuel efficiency and safety more about your laptop than your grease gun. If you want to stay ahead, invest in a J2534 pass-through device now. It will let you flash modules yourself and bypass the gatekeepers. My challenge to you this week: download a basic diagnostic app and look at your ‘Short Term Fuel Trim’ while the engine is warm. If it’s over 10%, you have a hidden issue waiting to happen. Start tracking it today.
The One Thing That Changed My Garage Game Forever
I used to be a ‘parts cannon’ guy—if something was wrong, I would just fire new parts at the car until it worked. The biggest lightbulb moment for me was realizing that most issues are about contamination or simple physics, not just wholesale hardware failure. For example, before you buy a new sensor, you should investigate the hidden benefit of cleaning your mass air flow sensor. It is a five-dollar fix that often solves a five-hundred-dollar problem. I also learned that knowing how to use your ears to find a suspension clunk is a more valuable skill than owning a hydraulic lift; your car is always talking to you if you know the language. Finally, do not ignore the small stuff—a tiny bit of graphite in a lock cylinder today prevents a snapped key nightmare next winter.
#IMAGE_PLACE_HOLDER_E#
The Gear That Actually Earns Its Keep
You do not need a professional shop to do professional work, but you do need tools that do not lie to you. I trust my Precision Instruments split-beam torque wrench because it stays calibrated through the toughest vibrations. For anything electrical, I rely on the OBDLink MX+; it is the most reliable way to keep up with auto repair trends to watch in 2025. And surprisingly, my most-used diagnostic tool is a simple rubber mallet. Whether it is unsticking a stubborn brake drum or knowing how to diagnose a bad fuel pump with a rubber mallet, it is a low-tech solution for high-stress situations. I also recommend keeping a physical logbook in your glovebox; tracking your maintenance history is the most underrated tool in your arsenal.
Your Journey Beyond the Broken Key
Extracting that broken key was just the beginning of your journey into mechanical self-reliance. Every time you pick up a tool, you are not just fixing a machine; you are building the confidence to handle whatever the road throws at you. By mastering these maximize your cars lifespan with expert tune-up strategies, you transition from a simple car owner to a guardian of your vehicle’s health. Do not be afraid of the complex software or the greasy bolts. You have already handled the rain-soaked nightmare of a snapped ignition key—the rest is just a manageable learning curve. Have you ever snapped a bolt or a key at the absolute worst possible moment? Let me know your biggest DIY horror story in the comments below!