
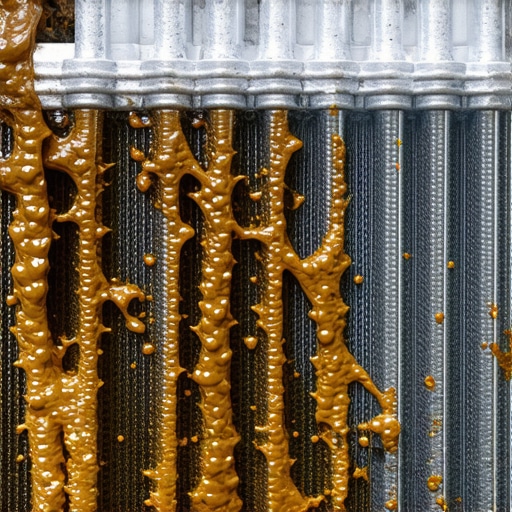
I remember standing in my driveway on a freezing Tuesday morning, staring at a small, neon-green puddle beneath my old sedan. I was broke, running late, and desperate. Instead of doing the right thing, I grabbed a bottle of that “miracle” radiator stop-leak from a gas station shelf. I thought I’d outsmarted the mechanic and saved a few hundred bucks. I was so wrong. Within two weeks, my cabin heat died, my engine temperature started climbing, and my radiator looked like it was filled with thick, gray oatmeal. It was a visceral lesson in why shortcuts usually take you the long way around.
That Ten-Dollar Bottle Nearly Cost Me My Entire Engine
We’ve all been there. You see the steam rising from the hood, or maybe you notice that your car smells like burning maple syrup while you’re sitting at a red light. Your heart sinks because you know a massive repair bill is coming. The temptation to dump a chemical “band-aid” into your cooling system is incredibly strong. I made that exact mistake early in my DIY journey because I was intimidated by the thought of a “real” repair. I genuinely believed the marketing—that the tiny fibers and metallic bits in the liquid would magically find the hole and stay there. Instead, they found every single place I didn’t want them: my heater core, my thermostat, and the microscopic passages in my engine block. What should have been a simple hose replacement or a thermostat swap turned into a $1,200 cooling system nightmare.
Today, I want to be that neighbor who stops you before you pour that sludge into your reservoir. We are going to dig into why these products are a gamble you’ll almost always lose and how you can spot a coolant leak before it leaves you stranded on the shoulder of the highway. Most importantly, I’ll show you how to identify the real culprit, whether it’s just a loose clamp or the hidden sign that your water pump is about to fail. Fixing it right the first time is actually cheaper than fixing the “fix” later on.
Can a “miracle in a bottle” actually save you money?
It’s a fair question to ask, and I get the skepticism. If these products didn’t work at least some of the time, they wouldn’t occupy so much real estate on the shelves of every auto parts store. The hard truth is that they might stop a pinhole leak for a few days, but they don’t discriminate. They don’t know the difference between a hole in your radiator and the critical passages your engine needs to stay cool. According to reports from AAA, cooling system failure remains a top cause of engine-related breakdowns, and adding foreign sludge to a pressurized system only accelerates that failure. You aren’t actually repairing the metal or the rubber; you’re just clogging the plumbing and hoping for the best. Have you ever tried one of these quick fixes only to have it backfire on you? I’d love to hear your experiences—did it actually hold, or did it make things worse? Before you reach for that bottle, let’s look at the science of what is actually happening inside your cooling system when you try to seal it from the inside out.
Find the Leak Without the Guesswork
Before you even think about that bottle of sealant, you need to know exactly where the fluid is escaping. Most people just peer into the engine bay with a flashlight and hope for a drip, but coolant is sneaky. It often evaporates the second it hits a hot engine block, leaving nothing but a faint white crust. This is where pressure testing becomes your best friend. Think of your cooling system like a balloon; if there is a pinhole, the only way to find it is to blow it up until the air—or in this case, the coolant—is forced out. You can usually rent a pressure tester from a local parts store for a refundable deposit. I once spent an entire Saturday afternoon tightening every hose clamp I could see on a leaky Jeep, only to realize after a five-minute pressure test that the leak was actually coming from a hairline crack on the back of the plastic overflow tank. I wasted six hours guessing when the right tool would have shown me the truth in seconds.
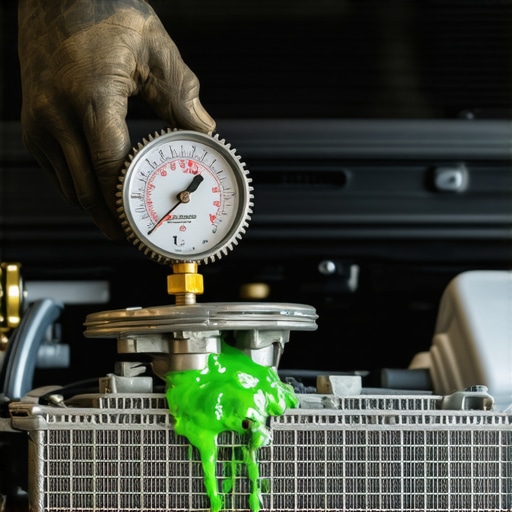
If you aren’t ready for a pressure test yet, start by looking for a coolant leak when the engine is stone-cold. Run your hand along the underside of the radiator hoses. If your fingers come back sticky or green, you’ve found a culprit. Also, look at the ground. If you see a puddle toward the front-middle of the car, you should check the hidden sign that your water pump is about to fail. Most pumps have a ‘weep hole’ designed to let fluid out when the internal seal goes bad. If that hole is damp, the pump is on its deathbed, and no amount of stop-leak is going to resurrect it.
Stop the Overheating Before it Starts
Sometimes the issue isn’t a leak at all, but a flow problem. If your car is running hot but the radiator is full, your thermostat might be the villain. It’s a tiny metal valve that acts as the gatekeeper for your engine’s heat. If it stays shut, the coolant can’t get to the radiator to cool down. You can actually use the easy way to check if your thermostat is stuck by feeling the upper radiator hose once the car is at operating temperature. If the engine is hot but the hose is cold, the gate is locked. I remember trying to swap a thermostat in a rainy parking lot because I was too impatient to wait for a tow. I didn’t let the engine cool down enough, and when I loosened the housing, a geyser of hot fluid soaked my shoes. It was a messy, painful reminder that patience is the most important tool in your kit.
Why Maintenance is Cheaper Than a Rescue
A lot of these issues can be avoided if you treat your cooling system as part of your regular tune up. Coolant eventually becomes acidic, eating away at your gaskets and seals from the inside out. By following the ultimate car service guide, you ensure that you are flushing that old, corrosive fluid out before it creates a hole. If you find yourself constantly troubleshooting common auto repair issues like mystery overheating, it is usually a sign that a major component is nearing the end of its life. Taking the time to replace a $20 hose today is infinitely better than replacing a $4,000 engine tomorrow because you trusted a ‘miracle’ liquid to do a mechanic’s job.
Don’t Stop at Just Swapping the Brake Pads
Most people assume that if their car stops and doesn’t squeal, the brakes are in perfect condition. I’ve seen countless weekend mechanics pat themselves on the back after a quick pad slap, only to wonder why their car pulls to one side or why their fuel economy has tanked. In my experience, new pads are only fifty percent of the job. The real nuance lies in the hardware you can’t see. If your caliper slide pins are dry or seized, your brand-new pads will wear at an angle, overheat, and eventually ruin your rotors. When you are understanding brake system repairs, you have to realize that the mechanical linkage is just as important as the friction material itself. If those pins aren’t moving freely, you aren’t fixing the car; you’re just delaying the inevitable. This is one of the most overlooked brake service myths that leads to expensive shop visits later on.
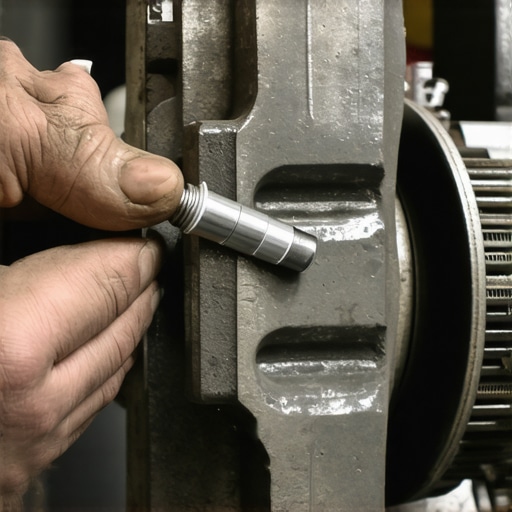
Even if you get the hardware right, many DIYers skip the most critical step: the proper way to break in new brake pads and rotors. This process, known as bedding-in, transfers a layer of friction material to the rotor. Without it, you’ll get those annoying vibrations that feel like warped rotors but are actually just uneven deposits. Have you ever fallen into this trap? I’d love to know if you’ve ever skipped the bedding process and regretted it later.
Is your old brake fluid actually eating your calipers from the inside out?
Here is where things get technical. Most owners focus on the hardware, but the fluid is the lifeblood of the system. Brake fluid is hygroscopic, meaning it actively absorbs moisture from the air. According to a study by the Car Care Council, nearly 80 percent of vehicles fail basic inspections due to neglected maintenance, and contaminated fluid is a primary culprit. Over time, that moisture lowers the boiling point of the fluid—making your brakes feel spongy in heavy traffic—and causes internal corrosion. If you notice why your brake fluid looks like coffee creamer, you’re already in the danger zone. That ‘creamer’ is actually a mixture of water and degraded rubber seals. Flushing the system isn’t just a suggestion; it’s a requirement to keep your ABS module from becoming a very expensive paperweight.
The Tune Up Trap You Need to Avoid
The term ‘tune up’ is a bit of a relic, but the mistakes people make during one are very modern. I see people spend hundreds on high-end spark plugs trying to fix a rough idle, while completely ignoring the air-fuel mixture sensors. In many cases, how a dirty mass airflow sensor can trigger a lean code error is the real mystery behind your engine’s poor performance. Swapping plugs is easy, but cleaning a sensor requires a more analytical approach. Furthermore, when you do get around to those plugs, the biggest mistake is over-tightening. I once saw a head cracked because a guy thought ‘extra tight’ meant ‘extra safe.’ Learning the proper way to torque wheel bolts and engine components is what separates a backyard tinkerer from someone who actually knows how to tell if your car needs a simple tune up or a major repair. Precision always beats force in the world of auto repair.
I used to be the guy who owned a single rusty adjustable wrench and a screwdriver that I used as a pry bar. That changed the first time I misdiagnosed a simple sensor issue as a failed fuel pump and spent a whole weekend dropping a gas tank for no reason. Authority in your own garage doesn’t come from a fancy toolbox; it comes from having the right data. If you want to stop guessing, you need to invest in a bidirectional scan tool. Unlike those cheap five-dollar code readers that only tell you ‘P0420,’ a real diagnostic tool lets you command the car to perform tests, like cycling the fuel pump or testing individual injectors. I’ve spent too many hours chasing phantom electrical draws only to realize that learning how to test your alternator with a simple multimeter at home was the missing piece of the puzzle. It’s not just about having the tool; it’s about knowing which pin on the harness is supposed to have five volts and which one is the ground.
The Diagnostic Kit That Actually Saved My Sanity
Beyond the electronics, my ‘desert island’ tool is a high-quality torque wrench. We talked earlier about over-tightening spark plugs, but it’s just as critical for your wheels and suspension components. I don’t trust my ‘calibrated elbow’ anymore. Whether I’m following a car service checklist or doing a major suspension overhaul, every bolt has a specification for a reason. According to technical documentation from SAE International, specifically the J1979 standard, the precision of modern automotive sensors means even a tiny vacuum leak or an improperly seated gasket can throw the entire engine timing into a tailspin. If you aren’t using a torque wrench, you’re essentially just guessing when the metal is going to fatigue.

How do I keep my car running past 200,000 miles without going broke?
The secret isn’t a special additive or a ‘miracle’ oil. It’s a shift in mindset from reactive to proactive. Most people wait for a noise before they open the hood. I’ve found that the real winners in the high-mileage game are those who implement expert tune up strategies before the check engine light ever flickers. This means inspecting your CV boots for tears every time you change the oil and flushing your brake fluid every two years regardless of mileage. If you stay ahead of the curve, you are never the person standing on the side of the highway waiting for a tow truck. By following the ultimate car service guide, you’re effectively paying a small ‘insurance premium’ in the form of fluids and filters to avoid the multi-thousand-dollar ‘catastrophe tax’ later.
The High-Tech Shift Coming to Your Driveway
Looking ahead, the DIY landscape is changing faster than most of us are ready for. As we look at auto repair trends to watch in 2025, it’s clear that software is becoming just as important as hardware. We are moving into an era where you’ll need to know how to tell if your local mechanic actually has the tools for a proper ADAS calibration after a simple windshield replacement or an alignment. Cameras and radar sensors are the new ‘wear items,’ and they require a level of digital precision we didn’t need ten years ago. I predict that within the next five years, the most valuable tool in your garage won’t be a wrench at all, but a laptop with an Ethernet-to-OBD2 cable. I challenge you this weekend to grab a simple multimeter and check your battery’s resting voltage; it’s the easiest way to start moving from a ‘parts swapper’ to a true diagnostic expert.
The One Hard Lesson That Taught Me Everything About Car Maintenance
If there is one thing a decade under the hood has taught me, it is that your ego is usually the most expensive tool in the shop. I used to think that because I could watch a quick video, I could skip the diagnostic phase and jump straight to parts swapping. I was wrong. Always remember that a noise or a leak is a symptom, not the root cause. For instance, the truth about budget spark plugs and engine performance is that saving five dollars now can lead to a misfire that ruins your catalytic converter later. Another lightbulb moment was realizing that ‘clean’ is a technical specification. Whether it is a gasket surface or a wheel hub, if it isn’t surgically clean, the part won’t seat correctly. Lastly, never ignore the sensory warnings; if you catch a whiff of sweetness from the vents, start troubleshooting common auto repair issues immediately rather than waiting for the steam to rise from your hood.
The Essential Gear That Will Save Your Weekend
You don’t need a professional-grade setup to keep your car healthy, but you do need precision. My first recommendation is a quality 3/8-inch drive torque wrench; without it, you are just playing a dangerous game of guessing when a bolt is ‘tight enough.’ Second, a set of flare nut wrenches will save you from rounding off soft metal lines when you are understanding brake system repairs in your own driveway. Finally, I always suggest keeping a physical copy of your vehicle’s factory service manual. Digital resources are great, but having those specific torque specs and wiring diagrams on a physical page is a rite of passage for any DIYer who wants to avoid mistakes.
#IMAGE_PLACEHOLDER_E#
Your Path to Becoming a Garage Hero
Car ownership doesn’t have to be a series of expensive surprises. When you take the time to maximize your cars lifespan with expert tune up strategies, you are gaining more than just a reliable ride; you are gaining personal independence. Start small with a basic car service checklist and work your way up to more complex tasks. You will find that the more you know about your vehicle, the less intimidating those warning lights become. Every successful auto repair starts with the right information and the patience to follow the process correctly. Have you ever tackled a repair that felt completely out of your league, only to find out it was actually quite simple once you had the right tool in your hand? Let me know in the comments below!